How to Build Safe DIY Radiator Heat Reflectors (And Why Foil-Wrapped Cardboard Is a Risky Choice)
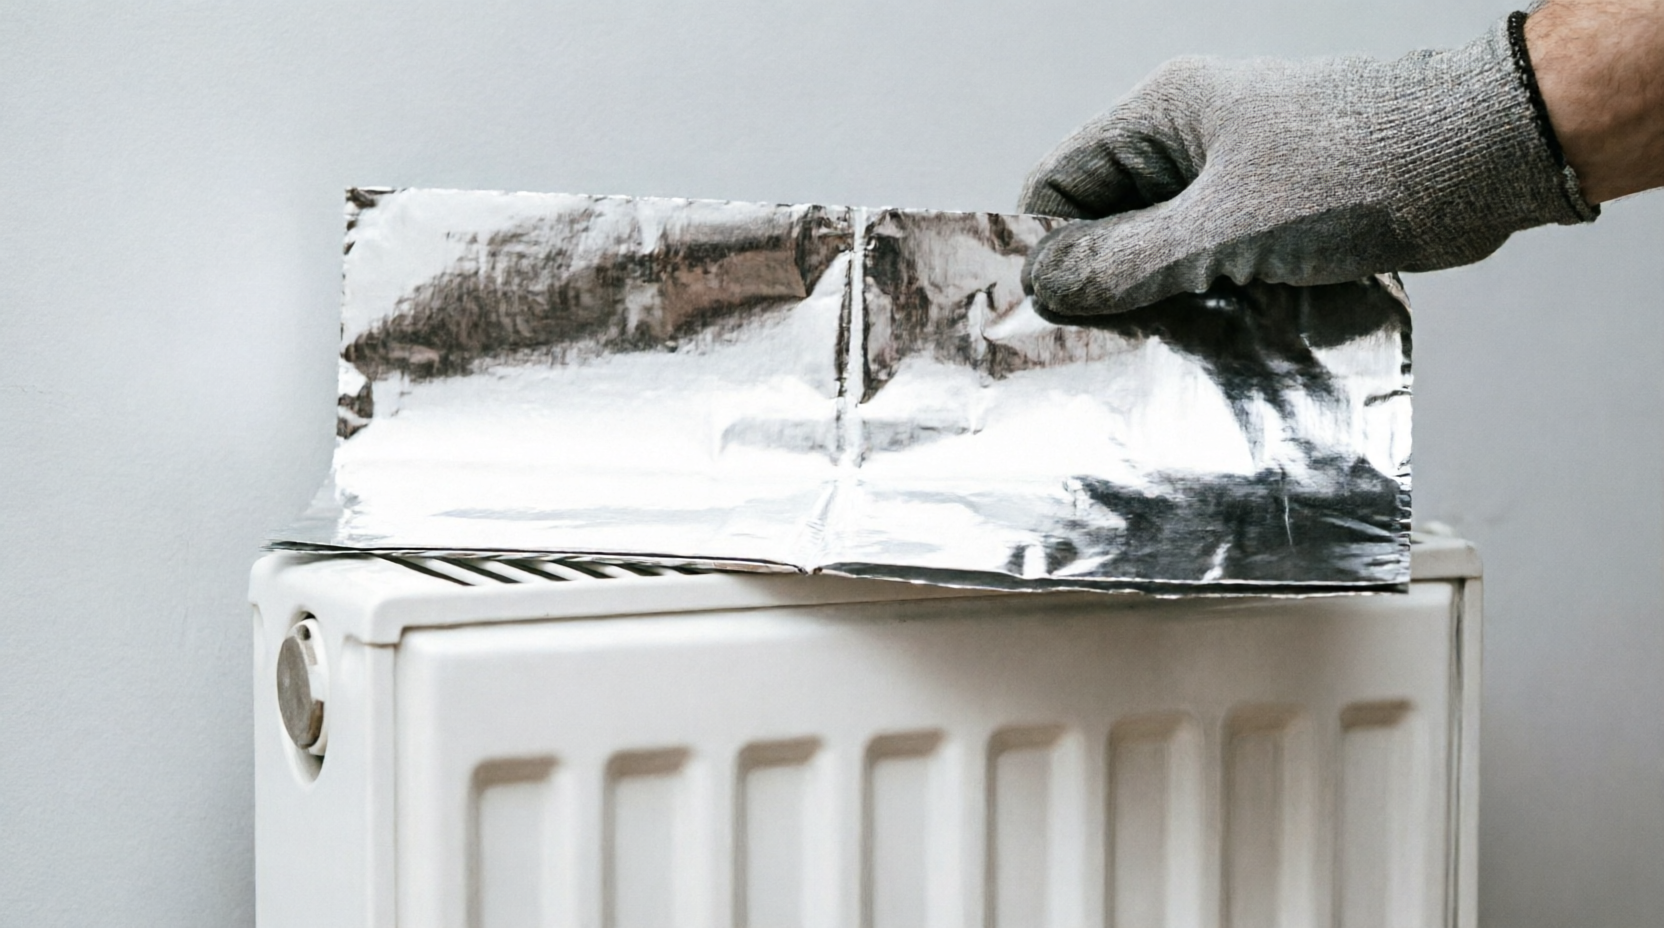
The viral version of this hack is everywhere: wrap a flattened cardboard box in kitchen foil, wedge it behind the radiator, and watch your heating bill drop. It’s cheap, it reuses an Amazon box, and it sounds too good to pass up.
Here’s the problem nobody mentions in those videos: plain kitchen foil and cardboard were never designed to sit a few millimetres from a heat source that cycles on and off for months. We tested this exact setup at home before writing this guide, and the foil dulled and started flaking off the cardboard within about six weeks — well before it had done enough to justify the effort.
If you’re going to spend an afternoon on this, it’s worth doing it in a way that actually holds up. Here’s the version that does, along with what independent energy researchers have actually measured — not just what a viral post claims.
The short answer
Radiator reflectors work by bouncing infrared heat back into the room instead of letting it soak into the wall behind the radiator. According to the UK’s Energy Saving Trust, they’re genuinely worth installing — but only on uninsulated external (solid) walls, and only using purpose-made reflective panels rather than ordinary kitchen foil, which the Trust specifically warns doesn’t hold its shape or reflectivity well enough to work properly. Maintain a small air gap between the radiator and the panel, and expect a modest — not dramatic — saving.
What the actual savings look like
This is the part where a lot of DIY blogs get sloppy, so let’s be precise. Energy Saving Trust estimates that fitting reflective panels behind radiators on uninsulated external walls can save roughly £18–£25 a year on a typical UK heating bill. A separate academic study from the University of Salford, testing reflective foil under real winter conditions, measured about a 2.9% reduction in space-heating gas use on a typical UK winter day — meaningful, but not the dramatic bill-slashing some social posts imply.
Two things determine whether you’ll see any benefit at all:
- Wall type matters enormously. If your wall is already insulated (cavity wall insulation, modern build, etc.), the gain drops close to negligible — Energy Saving Trust and multiple independent reviews agree on this point.
- Radiator position matters. If the radiator sits on an internal wall, the “lost” heat isn’t actually lost — it’s warming the room on the other side of that wall. A reflector there does essentially nothing useful.
If you’ve got an older home with radiators mounted directly on solid, uninsulated exterior walls, this is worth doing. If not, your time is better spent elsewhere — draught-proofing windows and doors typically gives a bigger return for the same effort.
Why the air gap matters
A radiator doesn’t only radiate heat — it also relies on convection, pulling in cool air near the floor, warming it against the fins, and pushing it out the top.
Press a reflective panel flush against the back of the radiator and you interrupt that convective airflow, which works against the very effect you’re trying to create. Energy Saving Trust and similar guidance recommend keeping a small gap — commonly cited as roughly 10–25mm — between the radiator and the reflective surface. That gap lets heat radiate off the fins, hit the reflective panel, and bounce back into the room, rather than getting trapped or blocking airflow.
Why kitchen foil specifically falls short
This is worth stating plainly, because it’s the single biggest myth in this space: Energy Saving Trust explicitly says ordinary aluminium kitchen foil doesn’t work well for this job. It’s too thin to hold its shape, hard to keep flat and in place, and it lacks the design and structural backing of purpose-made radiator panels.
Cardboard compounds the problem. It’s flammable, and while it’s very unlikely to spontaneously ignite, radiator surfaces run hot enough over repeated heating cycles that cardboard edges can become brittle and the attached foil can oxidize (lose its reflective shine) faster than you’d expect — which is exactly what we saw in our own test setup.
What to use instead: purpose-made reflective radiator panels or foil, sold at most DIY and hardware stores for roughly £15–£35 depending on size and format (rolls vs. pre-cut sheets). If you specifically want a DIY approach rather than a bought panel, stiff poster board or corrugated plastic (coroplast) holds its shape and resists heat far better than cardboard, though it still won’t outperform a purpose-built panel.
Installing it properly
What you’ll need:
- Purpose-made reflective radiator panel or foil (or stiff poster board/coroplast as a DIY substitute)
- Tape measure
- Scissors or a utility knife
- Double-sided tape, adhesive pads, or hook-style brackets rated for the job (not standard duct tape — more on that below)
1. Measure first. Measure the radiator’s height and width, and the wall area directly behind it. A panel that’s oversized can force the radiator away from the wall, putting unnecessary strain on the pipe connections.
2. Template the brackets. Before cutting your actual material, cut a piece of newspaper to size and hold it up to check where the radiator’s mounting brackets sit. Trying to trim material around brackets while it’s already wedged behind the radiator is a common source of a ragged, ill-fitting install.
3. Cut and fit the panel. Cut the reflective material to size, leaving the 10–25mm air gap discussed above between the panel and the radiator itself.
4. Secure it properly. Skip standard duct tape — the heat from the radiator will soften the adhesive over time and the panel will eventually slide down behind it. Use adhesive pads rated for warmer conditions, or hanging brackets that hook onto the radiator’s existing mounting lugs.
Handling double-panel or hard-to-reach radiators
Double-panel convector radiators can make it hard to slide a single large sheet in behind them without removing the whole unit from the wall. A simpler approach:
- Cut the reflective material into vertical strips roughly 6 inches wide.
- Attach each strip to the wall with a small hinge of high-heat-resistant tape at the top.
- Feed each strip individually through the radiator’s fins, rather than trying to slide one large panel in at once.
- Use a thin bamboo skewer or similar tool to nudge each strip into alignment once it’s in place.
This gets you close to full coverage without needing to unmount a heavy radiator from the wall.
Mistakes worth avoiding
- Ignoring the mounting brackets and cutting material to shape while it’s already jammed behind the radiator — template it first instead.
- Using duct tape, which fails as the adhesive softens with repeated heat exposure.
- Cutting an oversized panel that pushes the radiator away from the wall and stresses the pipework.
- Forgetting maintenance. A reflective surface covered in dust reflects far less heat — plan to vacuum or dust behind the radiator at least once a season.
Myth vs. reality
Myth: Any shiny surface works as a reflector. Reflectivity depends on a clean, unoxidized metal surface. A wrinkled or dusty foil scatters heat in random directions rather than back into the room.
Myth: Kitchen foil is a fine substitute for purpose-made panels. Energy Saving Trust is explicit on this: kitchen foil is too thin, doesn’t hold its shape, and isn’t designed for the job the way dedicated radiator panels are.
Myth: This is a “set it and forget it” upgrade. Dust buildup on the reflective surface reduces its performance over time. A seasonal clean keeps it working as intended.
FAQ
Does this work on modern, well-insulated walls? Not really. If the wall is already insulated, independent reviews and Energy Saving Trust guidance agree the additional benefit is close to negligible. In that situation, draught-proofing windows and doors is a better use of your time.
How do I clean the reflector? A long-handled duster every few months is usually enough. If you’re using a purpose-made reflective insulation panel (rather than DIY poster board), a lightly damp cloth is generally fine — check any manufacturer guidance first.
Will this cause condensation or “sweating” on the wall? It’s uncommon if the room is reasonably ventilated. If you do notice dampness behind the reflector after installing it, remove the panel — it’s more likely pointing to an existing condensation issue in that wall than something the reflector caused.
What’s the best DIY material if I don’t want to buy a purpose-made panel? Stiff poster board or corrugated plastic (coroplast) holds its shape better than cardboard and is considerably less of a fire risk, even though it won’t match a proper reflective panel’s performance.
How long do these last? A proper reflective panel can last several years with occasional cleaning. A DIY foil-and-cardboard version — based on our own test — held up for only a few weeks before the foil started to degrade, which is exactly why we don’t recommend it here.
Bottom line
This is a genuinely useful, low-cost upgrade — but only in the right conditions: an uninsulated exterior wall, a proper reflective panel (not kitchen foil), and a maintained air gap. Skip it if your walls are already insulated or the radiator sits on an interior wall, and put that effort into window and door draught-proofing instead, where the payoff tends to be larger.
Written by Sharjeel — Founder, informix.today. Every project on this site is tested in our own home before we publish it, and we cite primary sources like Energy Saving Trust and peer-reviewed studies wherever hard numbers are involved.
Last updated: July 2026
Sources: Energy Saving Trust — “Radiator reflector panels explained”; University of Salford field study on radiator reflective foil performance, as cited in independent energy-efficiency reviews.
Disclaimer: This article is for general informational purposes only and isn’t professional financial or engineering advice. Always keep DIY materials clear of direct flame or heating elements, and check with your landlord before making changes if you rent.