The Loft Hatch Insulation Trick That Most Homeowners Completely Overlook
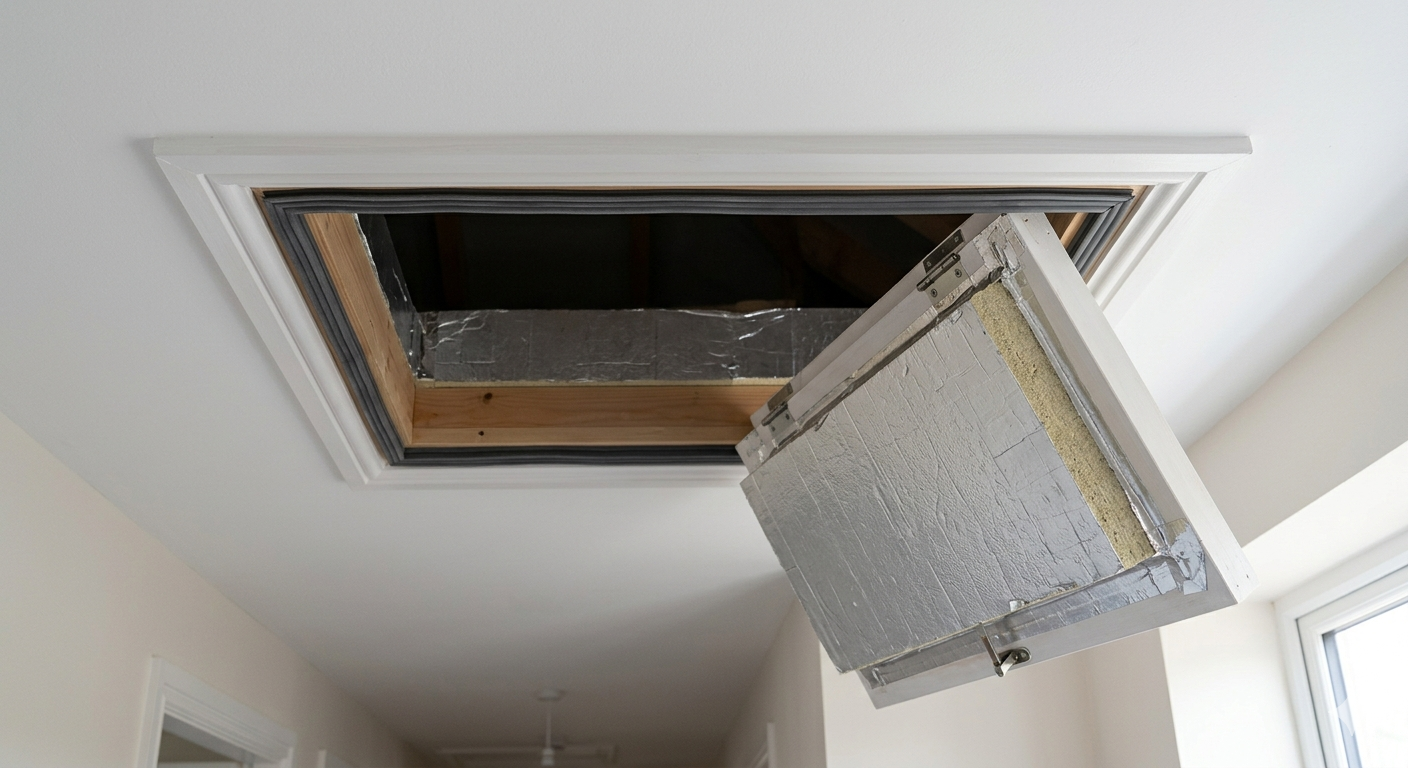
A loft hatch can be a tiny opening, but it is still part of the barrier between warm rooms and a cold loft space. That is why a hatch that is left bare, loose, or poorly sealed can leak heat even when the rest of the loft is already insulated. Official guidance from the Department of Energy and Energy Saving Trust both treat attic or loft access as a place that needs its own sealing and insulation, not just “whatever is left over.”
The quick answer
The trick is to treat the loft hatch like a small insulated door: seal the edge with weatherstripping, insulate the back of the hatch with rigid foam board or a similar layer, and make sure the hatch closes tightly enough to compress the seal a little. ENERGY STAR recommends self-sticking weather stripping and a rigid foam or fiberglass layer on the hatch itself, while DOE guidance says the hatch should close tightly, be durably insulated, and have its trim air-sealed as needed.
Why this overlooked gap matters
A lot of homeowners insulate the loft floor and then forget the access point. That is a problem because air leaks in the attic are one of the bigger places to save energy, and the hatch is listed in DOE’s home air-leak examples. In the UK, Energy Saving Trust also says a loft should be insulated and draught-proofed, and local guidance notes that an uninsulated hatch can let cold draughts into the house.
The practical result is simple: if the hatch is weak, the hallway or landing can still feel cooler than it should. You may have done the “big” insulation job, but the home still loses comfort through a small but active gap. That is exactly the kind of problem frugal home upgrades are meant to solve.
The trick: seal the edge first
The first part of the fix is the perimeter. ENERGY STAR says to finish the hatch with self-sticking weather stripping, and if the hatch rests directly on the moldings, add stops around the opening so the weatherstrip has a wider surface and can compress properly when the hatch is latched. DOE’s weatherstripping guidance also makes the general rule clear: use weatherstripping for movable parts, and use caulk for stationary cracks and gaps.
That matters because the hatch is not just a lid. It is a moving part, so the seal has to survive opening and closing. A soft, controlled compression is better than a loose fit that leaks air or a jammed fit that makes the hatch annoying to use. DOE’s attic-hatch job aid specifically says the access should close with a tight fit or latch and the trim should be air sealed with appropriate material.
Then insulate the hatch itself
The second part is the hatch lid. ENERGY STAR recommends cutting a piece of fiberglass or rigid foam board to the same size as the hatch and attaching it to the back of the hatch. DOE’s attic-hatch guidance also says the insulation should be durably attached, because a loose layer will shift, sag, or stop sealing well over time.
For most households, rigid foam is the cleaner DIY option because it is light, easy to cut, and simple to fasten. The main goal is not to build a giant insulated panel. The goal is to make the hatch behave more like part of the ceiling and less like a cold removable board. That fits the same “seal and insulate” logic that Energy STAR uses across attic air-sealing projects.
Cost-Saving Reality
This is one of those small jobs that can help more than its size suggests, but it works best as part of a wider air-sealing plan. ENERGY STAR says sealing air leaks around the home and adding insulation can provide up to 10% savings on annual energy bills, and it also notes that the attic is usually where some of the largest savings opportunities can be found. The hatch is not the whole project, but it is one of the easiest weak points to fix.
That is the real value here. You are not paying for a dramatic renovation. You are tightening a gap that many people overlook because it does not look important. In practice, those are often the jobs that feel cheapest and most satisfying because the improvement shows up quickly in comfort.
What usually goes wrong
The most common mistake is fixing the loft floor and ignoring the hatch. Energy Saving Trust specifically says to insulate and draught-proof the loft hatch at the same time as the loft insulation, and local UK guidance warns that a loft hatch can lose a significant amount of heat if it is left untreated.
The second mistake is blocking ventilation. Energy Saving Trust says loft insulation must not block vents, because that can lead to damp in the loft. Its draught-proofing guidance also warns that ventilation is still essential for air quality and building health.
The third mistake is compressing insulation with storage or boards. If the loft is also used for storage, you may need battens or raised boards so the insulation is not squashed flat. Energy Saving Trust notes that boards may need to be raised above the new insulation, and local guidance says to keep a safe walkway between the hatch and tanks if the joists are covered.
Myth vs Reality
Myth: If the loft already has insulation, the hatch does not matter.
Reality: The hatch is still an air-leak point, and both DOE and Energy Saving Trust treat it as a separate place that needs sealing and insulation.
Myth: Thicker material always solves the problem.
Reality: A good seal and a tight close are just as important as thickness. ENERGY STAR says the weatherstrip should be slightly compressed when latched, and DOE says the access should close tightly.
Myth: Draught-proofing means sealing every opening in the loft.
Reality: Ventilation still matters. Energy Saving Trust warns not to block vents, because that can create damp.
Myth: This is only a winter job.
Reality: A leaky hatch is a comfort issue year-round, because air sealing improves insulation performance in general, not just during cold snaps.
Step-by-step: the simple version most homes need
1) Check how the hatch closes
Open and close it slowly. If it rattles, sits loose, or leaves a visible gap, the seal is weak.
2) Add edge sealing
Use self-sticking weather stripping around the frame or stop area so the hatch compresses the seal when closed.
3) Insulate the back of the hatch
Fix a piece of rigid foam board or fiberglass board to the back of the hatch, cut to the same size as the opening. ENERGY STAR recommends this exact approach.
4) Make sure it still latches cleanly
DOE says the access should close with a tight fit or latch, and the trim should be air sealed if needed.
5) Keep the ventilation path clear
Do not push insulation into vents or cover the spaces that need airflow. Ventilation protects against damp and overheating.
Advanced note for experienced readers
If the hatch is old, warped, or used often, think beyond a simple patch. DOE’s attic-stairs guidance says the opening should be treated like an exterior opening and sealed thoroughly, and it adds that a good insulated cover should be durable, have an air seal, and have an insulation value similar to the rest of the attic insulation. That is useful thinking even for a plain hatch, because the weak point is not the foam itself, but whether the whole assembly behaves like a real barrier over time.
That is also where a small cover box or a purpose-built insulated hatch can make sense. DOE says a do-it-yourself cover box can be built or bought, and it can be significant if the existing stair hatch has open gaps. If your hatch area is used for storage, you may also need raised boards so the insulation is not crushed and a safe walkway is preserved.
A smart way to pair this with other low-cost heat-loss fixes
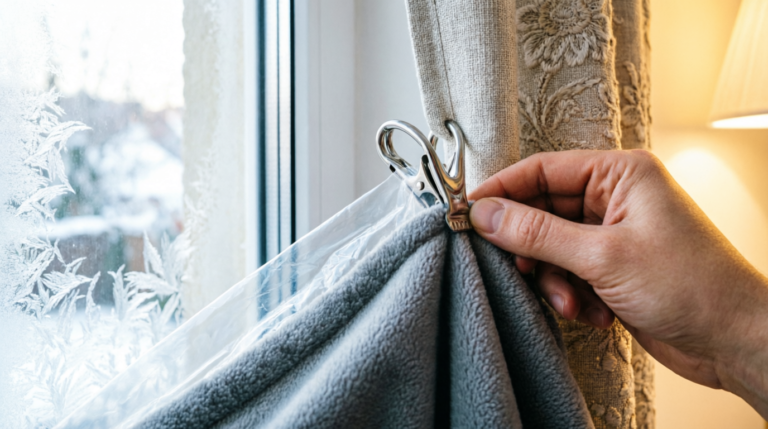
A loft hatch fix works well alongside other simple home comfort upgrades that stop heat loss where it starts. Related Informix Today guides that fit naturally with this topic are bubble-wrap window insulation trick, no-sew thermal curtain liner with thrifted fleece, and DIY radiator heat reflectors safe guide. Those articles all follow the same frugal-living idea: stop the easy losses first.
FAQ
1) Do I need to insulate the loft hatch even if the rest of the loft is already insulated?
Yes. Energy Saving Trust and DOE both treat the hatch as its own weak point, so the hatch still needs draught-proofing and insulation even when the loft floor is already covered.
2) What is the best material to use on the hatch?
ENERGY STAR recommends a piece of fiberglass or rigid foam board cut to the same size as the hatch, attached to the back of the lid.
3) Should I use caulk or weatherstripping around the hatch?
Use weatherstripping for the moving hatch edge. DOE says weatherstripping is for movable components, while caulk is for stationary cracks and gaps.
4) Can I block the vents near the loft hatch to stop drafts?
No. Energy Saving Trust says not to block vents, because that can cause damp and ventilation problems.
5) Is this worth doing if the hatch is only small?
Yes. DOE and ENERGY STAR both point out that attic air sealing and insulation are among the best places to improve comfort and reduce energy waste, and the hatch is one of the simplest access points to fix.