Pipe Lagging in a Weekend: How $8 of Foam Tubing Cuts Your Hot Water Bill
Most homeowners walk past their water heater pipes every day without a second thought. That bare copper or PEX running along the wall is quietly bleeding heat before the water ever reaches your tap — and the fix costs less than a takeout dinner.
Quick answer
If you can reach your hot water pipes, wrapping them in foam tubing is one of the best returns-on-effort in home energy savings. Prioritize the first few feet closest to the water heater, cover the cold-water inlet if it’s exposed, and don’t skip pipe runs through unheated spaces like a garage, basement, or attic. The one place to be careful: keep insulation clear of a gas flue, and switch to fiberglass wrap instead of foam if the pipe sits close to one.
Why a few feet of foam tubing matters
Water leaves the heater hot, but by the time it winds through your walls and floors to the faucet, it’s already given up some of that heat to the surrounding air. According to the U.S. Department of Energy, insulating hot water pipes cuts that heat loss and can deliver water at the tap that’s 2°F to 4°F warmer than an uninsulated line would allow — which sometimes lets you dial back the water heater’s thermostat slightly. The DOE also frames this as a genuinely small project: about three hours of work in a typical house, at a materials cost of roughly $10–$15.
Water heating isn’t a minor line item either. The DOE puts it at around 18% of a typical home’s total energy use, making it the second-biggest energy expense in most households after heating and cooling. Anything that reduces waste at that stage adds up. Energy Saving Trust, looking at UK homes, estimates a more modest but still real saving — about £6 a year from insulating exposed indoor pipes in a typical three-bedroom, gas-heated home.
There’s a comfort payoff too, not just a savings one. The DOE notes that insulated pipes shorten the wait for hot water to arrive at a faucet or showerhead, which means less water wasted down the drain while you wait for it to heat up.
Where to insulate first
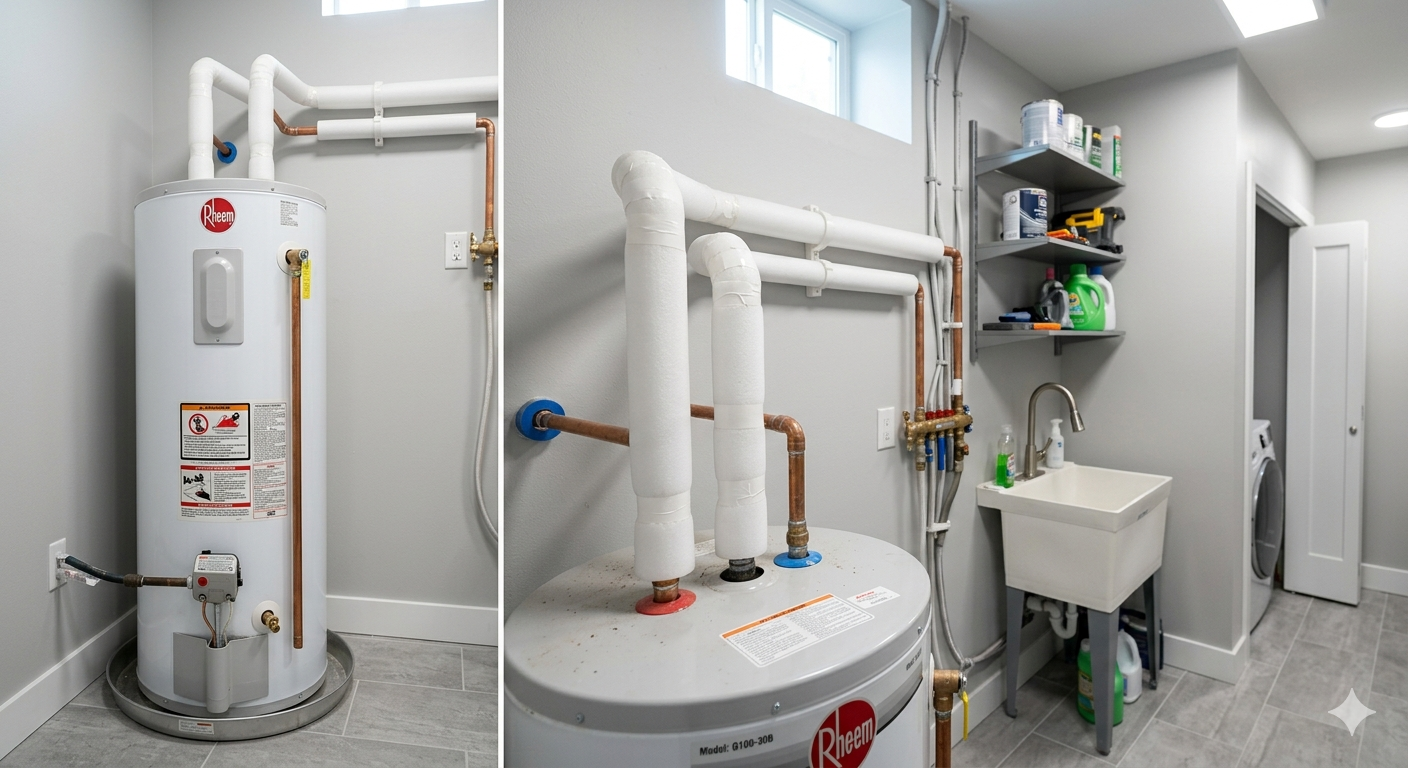
Start as close to the water heater as possible. The DOE specifically calls out the first 3 feet of pipe leaving the tank as the highest-value stretch to cover, and recommends doing the same for the first 3 feet of the cold-water inlet if it’s easy to reach. A separate DOE job aid for electric water heaters goes a bit further, suggesting the first 6 feet of both the inlet and outlet lines where they’re accessible.
From there, move to anything running through a cold space. Energy Saving Trust flags lofts, basements, and garages as priority zones — anywhere the pipe is exposed to outdoor-level temperatures rather than room temperature. If your run has elbows or joints, don’t skip them: foam sleeves can be notched and taped around bends, and Energy Saving Trust’s general advice is to use the thickest insulation that still fits snugly, since a loose or oversized sleeve won’t perform as well as a properly fitted one.
If you’re tackling this as part of a bigger weekend project, it pairs naturally with our loft hatch insulation guide and our DIY radiator heat reflector walkthrough — different rooms, same underlying idea of stopping heat before it escapes.
How to install it without making a mess of it
1. Shut off the hot water first. Energy Saving Trust’s guidance is simple here: turn off the heating and hot water supply before you start wrapping pipes, so you’re not working around scalding surfaces.
2. Size the sleeve to the pipe. The DOE’s instructions are to measure the pipe’s outside diameter and match it to the sleeve’s inside diameter for a snug fit. Polyethylene or neoprene foam sleeves are the standard choice for most residential setups, including electric water heaters.
3. Give gas flues a wide berth. This is the one safety rule worth memorizing: keep foam insulation at least 6 inches from a gas flue. If a pipe sits within 8 inches of one, the DOE recommends switching to unfaced fiberglass pipe-wrap, at least 1 inch thick, secured with wire or foil tape instead of foam.
4. Seal it properly. Place the seam face-down against the pipe and secure the sleeve every foot or two with tape, wire, or cable ties. On electric water heaters, make sure the insulation doesn’t block the pressure relief valve, thermostat, or any access panel — those need to stay reachable.
5. Handle bends and joints last. Cut and notch the foam to wrap around elbows, then tape the ends down. This is the step that separates a job that still looks good in two years from one that starts peeling apart after a few months.
Mistakes worth avoiding
The most common one is stopping too soon — insulating the pipe that’s easiest to see and skipping the stretch nearest the heater, which is actually the section that matters most.
A close second is a sloppy fit: sleeves that are too tight, too loose, or left with open seams lose most of their benefit. The DOE’s guidance is consistently about a snug fit with sealed seams, not just “wrapped.”
Using plain foam too close to a gas flue is a genuine safety issue, not just an efficiency one — that’s the one spot to follow the fiberglass-wrap rule exactly.
And it’s easy to forget the unglamorous spaces. A pipe running through a cold garage or unheated basement loses more heat than the same length of pipe running through a warm hallway, so those are exactly the runs worth prioritizing, not skipping.
Myth vs. reality
Myth: This only helps in winter. Pipes lose heat to their surroundings year-round, just at a lower rate in summer. The DOE doesn’t frame this as a seasonal fix.
Myth: More insulation is always better. Fit matters more than thickness. Energy Saving Trust’s advice is to use the thickest sleeve that still fits properly — an oversized, loosely-wrapped sleeve underperforms a well-fitted thinner one.
Myth: Only the hot line is worth insulating. The DOE also recommends the first few feet of the cold-water inlet, if it’s accessible, since it sits close to the same heat source.
Myth: This replaces other hot water savings steps. It’s one piece of a larger picture. The DOE lists using less hot water, lowering the thermostat, insulating the tank itself, and pipe insulation together as complementary steps, not substitutes for one another.
Is it worth doing?
This isn’t going to transform your utility bill on its own. The DOE estimates 3%–4% annual savings on water heating energy for a small-house DIY job costing $10–$15, and Energy Saving Trust’s UK estimate is a modest £6 a year. But for the time and money involved, it’s a low-risk, low-cost place to start — and it sets up bigger projects, like tank insulation or a thermostat adjustment, to actually work as intended.
FAQ
How much money does pipe lagging actually save? Expect a modest, not dramatic, saving — the DOE estimates 3%–4% of water heating energy annually for a small home, while Energy Saving Trust’s UK estimate is around £6 a year for exposed indoor pipes in a typical gas-heated home. Your result depends on how much pipe is exposed and where it runs.
Which pipes should I do first? The first 3 feet leaving the water heater, then any exposed hot water line running through a cold space like a garage or basement. The cold-water inlet’s first few feet are worth including if they’re easy to reach.
Is foam tubing safe near a gas water heater? Yes, with one exception: keep it at least 6 inches from the flue. Closer than 8 inches, switch to unfaced fiberglass pipe-wrap instead.
Do I need a professional for this? No — if the pipes are exposed and reachable, this is a standard DIY job with materials from any hardware store. Just shut off the hot water first.
Will this make hot water arrive faster at the tap? Yes. Less heat lost along the way means less time waiting for hot water to reach the faucet or shower, which also cuts down on wasted water.
Bottom line
This is a small, cheap project that rewards you twice — a slightly lower bill and noticeably less waiting around for hot water. Start at the tank, work outward through any cold spaces, respect the flue clearance on gas heaters, and pair it with your other insulation projects, like our loft hatch guide, for a bigger combined effect.
Written by Sharjeel — Founder, informix.today Last updated: July 2026
Disclaimer: This article is for general informational purposes only and isn’t professional engineering, financial, or legal advice. Always follow manufacturer instructions and turn off your water supply before working near your water heater.