How to Dry and Store Herbs From a Windowsill Garden So They Last All Winter
Your windowsill basil is gorgeous in July. By December, it’s a leggy shadow of itself — or already composted. You could keep buying those $4 plastic clam shells of fresh herbs at the grocery store, or you could do what frugal windowsill gardeners have done for generations: dry your summer abundance now and enjoy it all winter for free.
The good news is that drying herbs isn’t complicated. The bad news is that most online guides skip the real-world problems — like why your parsley turns to mush instead of drying, or why your oven-dried oregano smells like nothing. This guide covers what actually happens when you try to dry herbs at home, including the mistakes that ruin flavor and the storage tricks that keep herbs potent for a full year.
❓ The problem: Your windowsill basil and mint are thriving now, but in a few months they’ll wither or stop producing — leaving you buying $3–5 herb packs at the store all winter.
👪 Who this helps: Windowsill gardeners, apartment growers, and anyone who wants summer’s fresh herb flavor without the winter markup.
✅ What you’ll learn: 4 foolproof drying methods (air, dehydrator, microwave, oven) and exactly which works for basil vs rosemary, the humidity trap that ruins most air-drying attempts, and how to store herbs so they don’t become pantry moth food.
💰 What you’ll save: $30–80 per winter by avoiding store-bought dried herbs, plus zero waste from your windowsill plants.
🛠️ Your next step: Harvest your herbs tomorrow morning (pre-water), pick your drying method, and have winter herbs ready by next week.
📅 Do this now: Herbs lose potency every day they sit on the plant past peak. Don’t wait until they bolt or turn woody.
The “Damp Failure” — Why Your Parsley Won’t Dry (And What Humidity Has to Do With It)
You followed the instructions: tied your herbs in small bundles, hung them in a warm spot, and waited. Three days later, they’re still damp. A week later, they’re fuzzy with mold. What went wrong?
The answer is humidity. Herbs need relative humidity below 60% to air-dry successfully — and many kitchens, basements, and laundry rooms sit at 65–75% RH, especially during summer or in coastal areas.
Here’s how to know if humidity is your problem — and what to do about it:
| Problem Sign | Likely Cause | The Fix |
|---|---|---|
| Herbs still soft after 7+ days | RH > 65% | Abandon air drying; switch to dehydrator or microwave |
| Black spots or white fuzz appearing | Mold from trapped moisture | Discard immediately — do not use |
| Herbs feel dry on outside but mushy inside | Uneven airflow + high RH | Spread in single layer on mesh screen, not solid surface |
| Stems bend instead of snap after 10 days | Humidity too high for complete drying | Finish in warm oven (150°F) for 30–60 minutes |
Low-tech humidity test (no hygrometer needed): Place a small bowl of table salt next to your drying herbs. If the salt clumps or feels damp to the touch after 24 hours, your RH is too high for air drying.
Bottom line: If you live in a humid environment or it’s a rainy week, don’t waste time with air drying. Use a dehydrator or microwave from the start.
The Flavor-Killer Mistake 90% of Home Dryers Make
Here’s something almost no basic guide tells you: heat above 95°F destroys the volatile oils that give herbs their flavor and aroma. Those oils — thymol in thyme, rosmarinic acid in rosemary, linalool in basil — are what you’re paying for at the store.
So why do so many oven-drying guides say “set your oven to 170°F or 200°F”?
Because those temperatures are for dehydrating meat or fruit, not preserving delicate herbs. At high heat, two things happen:
- Volatile oils evaporate or break down — leaving herbs that smell like hay or nothing.
- The Maillard reaction (the browning that makes toast taste good) turns green herbs brown and bitter.
The actual safe heat range for herb drying is 95–115°F. Most ovens don’t go this low. If your oven’s minimum is 170°F, oven drying will almost certainly damage flavor — unless you use the “oven off, door cracked” method (more on that below).
Herb heat sensitivity chart:
| Herb | Heat-Sensitive? | Best Drying Method |
|---|---|---|
| Basil | Very high (loses flavor fast) | Air dry or dehydrator at 95°F |
| Mint | Moderate | Dehydrator or microwave |
| Rosemary | Low (oily leaves hold up) | Any method works |
| Oregano | Low | Any method works |
| Parsley | High | Air dry or low-temp dehydrator |
| Cilantro | Very high | Freeze instead of dry |
Expert tip from Mountain Rose Herbs: “Warm, not hot, is the key. Too much heat will roast your plant material (which makes it lose color and potency) instead of nicely drying it.”
How to Dry Herbs: 4 Methods (With the Truth About Each)
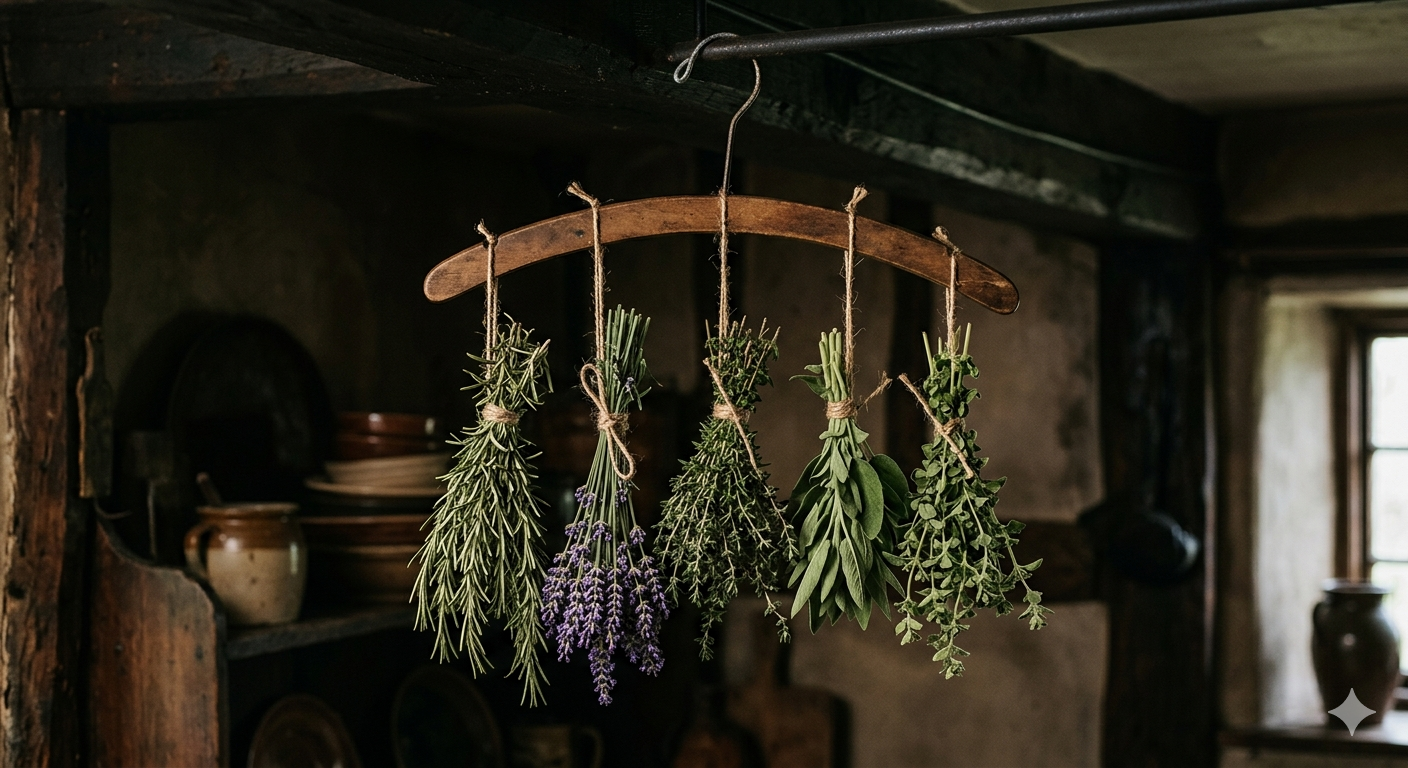
Method 1: Air Drying — Free but Fussy
Best for: Rosemary, oregano, thyme, dill, bay leaves. Worst for: Basil, parsley, cilantro, mint.
How to do it right:
- Harvest in the morning after dew has dried but before the sun is high.
- Remove damaged lower leaves. Do NOT wash wet herbs — brush off dirt or wash and then spin/pat completely dry. Drying wet herbs invites mold.
- Bundle 5–8 stems loosely with a rubber band (it tightens as stems shrink).
- Hang upside down in a warm, dark, dry place with good airflow — NOT in direct sun. Sunlight fades color and destroys oils.
- An old window screen laid flat on two chairs is often better than hanging — air circulates above and below, preventing mold.
Drying time: 3–10 days depending on humidity.
Method 2: Dehydrator — Best Flavor, Moderate Cost
Best for: Everything, especially basil and other heat-sensitive herbs.
How to do it right:
- Set temperature to 95–100°F (not higher).
- Spread herbs in a single layer on trays.
- Dry for 1–4 hours, checking every hour. Herbs are done when they crumble easily and stems snap when bent.
- Do not overload trays — crowding traps moisture.
Why it’s worth it: A dehydrator preserves more flavor than any other method because of consistent low heat and airflow. A $40–60 dehydrator pays for itself after one winter of not buying dried herbs.
Method 3: Microwave — Fastest, But Only for Small Batches
Best for: Small batches of basil, mint, or parsley leaves (no stems).
How to do it right (carefully):
- Place clean, dry leaves between two paper towels on a microwave-safe plate.
- Microwave on high for 20–30 seconds.
- Check. If not dry, repeat in 10-second intervals.
- Do not walk away. Herbs can catch fire if over-dried.
- Leaves are ready when they are brittle and crumble between fingers.
Limitations: Only small quantities at a time. Not suitable for large harvests. UCANR Extension notes: “Monitor closely, as herbs can catch fire if over-dried.”
Method 4: Oven Drying — Generally Not Recommended (But Here’s How)
The problem: Most ovens don’t go low enough. 170°F is too hot for most herbs.
The workaround (if you have no other option):
- Preheat oven to its lowest setting (often 170°F).
- Turn oven OFF.
- Place herbs in a single layer on a baking sheet.
- Put in the warm oven with the door propped open 2–3 inches (use a wooden spoon).
- Check every 30–60 minutes. Herbs will dry in 2–4 hours.
Why this works: The open door prevents heat from building up past ~100°F while still allowing air circulation. Without the open door, you’ll roast your herbs.
The Pest Problem No One Talks About (Pantry Moths Love Dried Herbs)
You dried your herbs perfectly. You stored them in a glass jar. Three months later, you open the jar and tiny moths fly out. Your herbs are full of webbing and little brown specks.
This is a pantry moth infestation — and it’s the #1 reason people throw away dried herbs. Moth eggs are microscopic; they can be on herbs before you harvest them or enter through unsealed containers.
Your pest-proofing checklist:
- ✅ Freeze before storing: Place dried herbs in a sealed bag and freeze for 48 hours at 0°F. This kills any eggs or larvae.
- ✅ Use airtight glass jars with rubber gaskets (moths can chew through plastic bags and thin plastic lids).
- ✅ Add a bay leaf to each jar — the smell repels some pests (though not all).
- ✅ Store away from other dry goods — moths spread from flour, pasta, and cereal.
- ✅ Check jars monthly for webbing, dust, or tiny moving specks.
One freezer trick: If you live in a cold climate, you can freeze herbs outdoors in winter instead of using your freezer. But 48 hours at 0°F is the standard — less time may not kill eggs.
Windowsill vs. Dehydrator — The Hidden Energy Math
If you’re drying herbs to save money, using an oven for 4 hours might cost more than just buying dried herbs. Here’s the real energy cost in 2026:
| Drying Method | Typical Duration | Est. kWh Used | Est. Cost (18.2¢/kWh) | Flavor Quality |
|---|---|---|---|---|
| Air drying | 3–10 days | 0 | $0 | Good (if humidity permits) |
| Dehydrator (100°F) | 2–4 hours | 0.3–0.5 | $0.05–0.09 | Excellent |
| Microwave | 2–5 minutes | 0.05–0.1 | $0.01–0.02 | Fair (only small batches) |
| Oven (170°F, door cracked) | 2–4 hours | 1.5–2.5 | $0.27–0.46 | Poor to Fair |
| Oven (closed, 170°F) | 2–4 hours | 2.0–3.0 | $0.36–0.55 | Poor (flavor destroyed) |
Bottom line: Air drying is free but fails in humidity. A dehydrator costs a few cents per batch and delivers the best flavor. Oven drying costs 10x more than a dehydrator and ruins flavor — it’s the worst of both worlds.
Cost-Saving Reality
Let’s be honest about the numbers. A typical household that cooks with herbs 2–3 times per week spends:
- Fresh herbs from grocery store: 3–5perpack∗∗x2packs/weekx26weeksofwinter=∗∗3–5perpack∗∗x2packs/weekx26weeksofwinter=∗∗156–$260 per winter
- Dried herbs from store: 2–4perjar∗∗x8jarsperwinter=∗∗2–4perjar∗∗x8jarsperwinter=∗∗16–$32
Drying your own herbs from a windowsill garden costs zero after the initial setup. Your windowsill plants cost almost nothing to maintain — seeds are pennies, and water is nearly free. A $50 dehydrator pays for itself in one winter.
But here’s the reality check: If you have only one basil plant on a small windowsill, your harvest might be too small to bother drying. For small harvests, freezing herbs in olive oil (ice cube trays) is more practical.
Common Mistakes to Avoid
- Mistake 1: Drying in direct sunlight. Sunlight doesn’t speed drying — it fades color and destroys volatile oils. Herbs dried in sun look brown and taste like nothing.
- Mistake 2: Bundling stems too tightly. Thick bunches trap moisture in the middle, leading to mold. Looser is safer.
- Mistake 3: Skipping the wash (or washing wrong). Some herbs have soil or tiny bugs. Wash gently, then spin or pat completely dry before starting. Drying wet herbs = mold.
- Mistake 4: Storing in plastic bags. Plastic isn’t airtight over time. Moisture gets in, flavor gets out, and pests chew through. Glass jars only.
- Mistake 5: Forgetting to label. Dried rosemary and dried thyme look very similar. Label jars with herb name AND date.
Myth vs Reality
| Myth | Reality |
|---|---|
| “Any warm place works for drying.” | Warm is good. Hot destroys flavor. Aim for 80–95°F, not >100°F. |
| “Dried herbs last forever.” | Dried herbs lose significant flavor after 12 months. Use within a year for best results. |
| “Oven drying is fine if you watch it.” | Most ovens don’t go low enough. Even with the door cracked, you’re likely damaging flavor. |
| “You should dry herbs as soon as you harvest.” | Harvest at peak oil content (morning after dew dries, before flowering). But wash and dry immediately after harvest. |
| “Crushing herbs before storing makes them easier to use.” | Crushing increases surface area, causing faster oxidation and flavor loss. Store whole, crush as you use. |
One Advanced Habit: The “Crush-at-Use” Rule for Maximum Shelf Life
Here’s a habit that separates beginners from people who actually keep herbs for 12+ months without losing flavor.
Store herbs whole. Crush them as you cook.
Why? When you crush or grind herbs, you dramatically increase the surface area exposed to oxygen. Oxidation destroys volatile oils — the flavor compounds. Whole leaves have very little exposed surface area. Crushed herbs have 10x or more.
The crush-at-use workflow:
- Store whole dried leaves in airtight glass jars.
- When cooking, take out the whole leaves.
- Crush or rub them between your palms directly over the pot.
- The essential oils release right where they’re needed, not weeks ago in a storage jar.
Exceptions: Rosemary and oregano have tougher, oilier leaves that hold up well to pre-crushing. But for basil, mint, parsley, cilantro, and dill — whole storage is noticeably better.
The freshness test: If your dried herbs have lost their color (turned brownish or grey) or have no smell when you open the jar, toss them. They won’t add flavor to your cooking.
FAQ
Q1: Can I dry herbs from my windowsill garden all year round, or only in summer?
A: You can dry herbs whenever you have a harvest, but summer and early fall (before flowering) give you the highest oil content. Winter growth is often slower and less flavorful. Time your big drying session for late summer.
Q2: How do I know when herbs are completely dry?
A: Leaves should crumble easily between your fingers. Stems should snap when bent, not bend. If there’s any flexibility or softness, they need more time. Leaves that bend or feel leathery are not done — and will mold in storage.
Q3: Can I dry different herbs together?
A: Yes, but separate strong-flavored herbs (rosemary, oregano, sage) from delicate ones (basil, parsley) if air-drying. Strong herbs can transfer flavor. In a dehydrator, it’s fine as long as trays aren’t touching.
Q4: What’s the best way to store dried herbs for maximum shelf life?
A: Airtight glass jars (amber or dark glass is best — light degrades oils) in a cool, dark cupboard. Not above the stove (heat) or near a window (light). Use within 12 months.
Q5: Can I dry herbs in an air fryer?
A: Yes, if your air fryer has a dehydrate setting (typically 95–120°F). Follow dehydrator instructions. If your air fryer only has a “low” setting above 150°F, don’t use it — you’ll cook rather than dry.
Written by Sharjeel — Founder, informix.today
Last Updated: May 2026
Disclaimer: This article is for informational purposes only and does not constitute professional financial or legal advice. Always test DIY methods safely. Individual results vary based on local humidity, herb variety, and drying equipment.