Compost in a Bucket: How Apartment Dwellers Can Feed Their Plants for Free
Turn kitchen scraps into free fertilizer using a 5‑gallon bucket. No smell. No backyard. Save $40‑100/year feeding your windowsill herbs and balcony tomatoes.
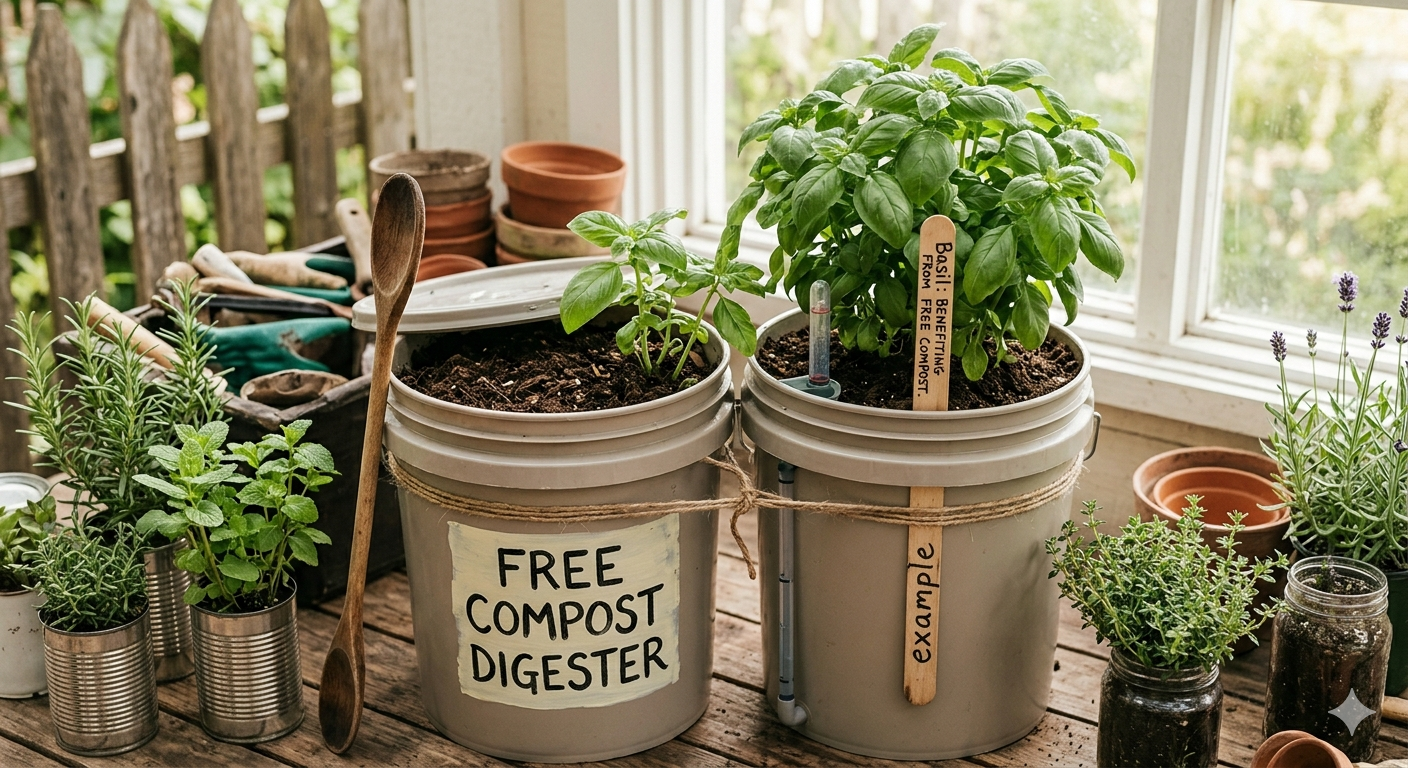
You don’t need a sprawling backyard to make compost — or to keep spending $10–20 every few weeks on fertilizer bags. If you have a windowsill garden of herbs and vegetables, a bucket of balcony tomatoes, or even just a few houseplants, you can turn your kitchen scraps into free, nutrient‑dense plant food right inside your apartment.
The secret? A humble 5‑gallon bucket and a simple routine that takes less than 30 minutes per week. No smell, no mess, no special equipment — just free fertilizer from scraps you’d otherwise throw away.
❓ The problem: You grow herbs and tomatoes on your windowsill and balcony, but store‑bought fertilizer costs $10–20 per bag — and you’re throwing away kitchen scraps that could be free plant food.
👪 Who this helps: Apartment dwellers, balcony gardeners, and anyone with a 5‑gallon bucket and a small space to tuck it away.
✅ What you’ll learn: How to set up a DIY bucket composter in 30 minutes, the two‑bucket continuous flow system that never makes you wait, and which method (bokashi vs worms vs aerobic) actually fits your cooking habits.
💰 What you’ll save: $40–100 per year on fertilizer — plus you stop buying potting soil for your windowsill garden by making your own.
🛠️ Your next step: Grab an old 5‑gallon bucket, drill 10–15 holes in the lid and sides, and start collecting your coffee grounds and veggie scraps.
📅 Do this now: Each pound of kitchen scraps you bury in a landfill produces methane. Each pound you compost feeds your plants for free.
Which Method Actually Fits Your Apartment? (The “Bokashi vs. Worm” Decision Tree)
Before you drill a single hole, you need to choose one of three bucket composting methods. Each works perfectly in an apartment — but they handle different types of scraps and require different space and follow‑up steps.
Here’s a decision tree to help you pick the right one:
| Question | If YES → | If NO → |
|---|---|---|
| Do you eat meat, fish, or dairy regularly? | Choose Bokashi bucket (only method that handles meat/dairy safely) | Go to next question |
| Do you have access to outdoor soil (balcony planter, community garden, or friend’s yard) to bury fermented waste? | Bokashi requires soil burial after fermentation. If yes, Bokashi still works | If no, skip Bokashi |
| Do you want a system that never needs outdoor burial? | Choose Worm bin (red wigglers live indoors year‑round, output goes directly into pots) | Go to next question |
| Do you cook 5+ times per week and want zero ongoing costs (no worm purchases, no bran)? | Choose Aerobic bucket composting — 100% free, but takes longer | Any method works — choose based on space |
Quick rule of thumb:
- Bokashi → best for meat/dairy eaters, but you must have somewhere to bury the pre‑compost (even a large pot of soil on a balcony works).
- Worm bin → best for zero‑outdoor‑burial households, but worms can’t eat meat, dairy, or citrus.
- Aerobic bucket → cheapest and simplest, but slowest (6–8 weeks).
The “Bokashi vs. Worm” Decision Tree (One Actually Handles Meat and Dairy)
| Method | Handles Meat/Dairy? | Needs Outdoor Burial? | Annual Cost | Output Speed | Best For |
|---|---|---|---|---|---|
| Bokashi | Yes — meat, fish, dairy, cooked food all safe | Yes — fermented waste must be buried in soil to finish | $15–30 (bokashi bran refills) | 2‑4 weeks to ferment, then 2 weeks to neutralize | Households that eat meat/dairy and have a balcony pot or community garden |
| Worm Bin | No — meat, dairy, citrus, onion kill worms or cause smell | No — castings go directly into pots | $20–40 (worms + bedding, one‑time) | 2‑4 months | Plant‑based households with zero outdoor access |
| Aerobic Bucket | No — meat/dairy cause rot and pests | No — finished compost is safe for pots | $0 (uses scavenged buckets) | 6‑8 weeks | Anyone who wants free, no‑buy composting |
Real‑world example: A household that eats chicken twice a week and cooks with cheese needs Bokashi — worms can’t handle those scraps. A vegan household with a sunny balcony can use worms or aerobic bucket. The choice depends entirely on your actual trash can, not gardening magazines.
The “Zero Smell” Myth (When Your Bucket Will Stink and How to Rescue It)
Most articles promise “odor‑free composting,” but they never explain what to do when your bucket suddenly smells like a swamp. Here’s the truth: a healthy bucket smells like damp earth or pickles. If it smells different, something is wrong — and you can fix it in minutes.
| Smell Type | What It Means | Rescue Steps |
|---|---|---|
| Pickled / sour (like sauerkraut) | Normal for Bokashi — fermentation happening | No action needed. If too strong, add more bran. |
| Ammonia / cat pee | Too many greens (nitrogen‑rich scraps), not enough browns | Add shredded cardboard or dry leaves immediately — 1 part browns for every 1 part existing volume. Stir well. |
| Rotten eggs / sulfur | Pile is too wet and anaerobic (no oxygen) | Add dry browns (shredded paper, cardboard) and stir vigorously to introduce air. If dripping wet, tip bucket on its side to drain, then add browns. |
| Rancid / garbage | Meat or dairy in an aerobic bucket or worm bin | Remove the offending scraps if possible. If not possible and smell persists, discard batch and restart. |
| No smell at all (but cold) | Pile is too dry or too carbon‑heavy | Add water slowly while stirring until contents feel like a wrung‑out sponge. Add a handful of coffee grounds. |
The most common cause of apartment compost failure: people give up after one smell incident. Don’t. Almost every smell is fixable in under 10 minutes. The right rescue steps turn a stinky bucket into a working one overnight.
The One Ingredient That Speeds Up Compost by 3x (And It’s in Your Coffee Maker)
Coffee grounds are the secret weapon of apartment composters. They’re a “green” (nitrogen‑rich), but unlike wet fruit scraps, they have near‑perfect moisture content and are already ground into small particles that microbes can attack immediately.
Why coffee grounds work so well:
- They introduce billions of beneficial microbes into your bucket.
- The slight acidity helps break down tough plant fibers.
- Caffeine residue actually stimulates microbial activity (studies show coffee grounds increase decomposition speed by 20–30% compared to equal‑weight fruit scraps).
How to use them correctly:
| Coffee Grounds Volume (relative to bucket) | Result |
|---|---|
| Less than 10% | Minimal effect — still helpful |
| 10–25% | Ideal range — noticeable speed increase, no negative effects |
| 25–50% | Excess nitrogen — may cause ammonia smell. Balance with extra browns (shredded paper) |
| Over 50% | Too acidic — slows worms, may kill them. Add crushed eggshells to buffer pH |
Pro tip: Most Starbucks locations give away used coffee grounds for free through their “Grounds for Your Garden” program. Call ahead, bring a bucket, and you can stockpile a month’s worth of accelerator at zero cost.
The Frozen Scrap Loophole (Why Your Bucket Stops Working in Summer Heat)
Apartment composting works year‑round, but the season changes how it works. Here’s what happens and how to adapt:
Summer (85°F+ indoors):
- Microbes work faster — compost finishes in half the normal time.
- But faster isn’t always better. Overheating kills beneficial microbes and can melt plastic bucket seals.
- The fix: Freeze your kitchen scraps before adding them to the bucket. Frozen scraps lower the internal temperature and release water gradually instead of all at once.
- Keep bucket out of direct sunlight — even behind a curtain can make a difference.
Winter (60°F or below indoors):
- Worm activity slows — red wigglers become sluggish below 55°F.
- Bokashi fermentation extends from 2 weeks to 3–4 weeks.
- Aerobic decomposition nearly stops below 50°F.
- The fix: Move bucket closer to the kitchen (warmer than a cold balcony). For worm bins, wrap a towel around the bin for insulation. For bokashi, add 20% more bran than usual.
The apartment‑specific reality check: If you live in a studio with poor insulation, your bucket will experience temperature swings. The best permanent spot is the warmest dark corner — usually near the refrigerator (which gives off heat) or under the kitchen sink near the hot water pipe.
One Advanced Habit: The Two‑Bucket Continuous Flow System (No More Waiting Between Batches)
Single‑bucket composters have a frustrating flaw: once the bucket is full, you must stop adding scraps for 6‑8 weeks while it finishes. For a household that cooks daily, that’s a dealbreaker.
The solution is a two‑bucket continuous flow system — built from two identical 5‑gallon buckets for under $10, and it lets you feed your compost every single day without interruption.
What you’ll need:
- Two 5‑gallon buckets with lids (food‑grade — ask a grocery store bakery or deli for free ones)
- A drill with 1/4‑inch and 1/8‑inch bits
- One small brick or a few stones
Step‑by‑step build (30 minutes):
- Drill the “top bucket”: Drill 20–30 holes (1/4‑inch) in the bottom of Bucket A for drainage. Drill 10–15 smaller holes (1/8‑inch) around the top sides for airflow.
- Prepare the “bottom bucket”: Bucket B stays undrilled. Place a brick or stones in the bottom to lift Bucket A up slightly — this creates space for liquid to collect.
- Stack them: Place Bucket A inside Bucket B. The bottom bucket catches liquid runoff (compost tea — a free liquid fertilizer).
- Start layering: Add 2 inches of shredded cardboard or dry leaves to the bottom of Bucket A (browns). Then add kitchen scraps (greens) in a 1‑inch layer. Cover with another 1‑2 inches of browns. Repeat.
- The “lazy turn”: Once a week, lift Bucket A out of Bucket B and give it a gentle shake or roll on its side to mix contents. Do not open the lid while shaking — the trapped heat and humidity help decomposition.
- Harvest from the bottom: After 6–8 weeks, the oldest material at the bottom of Bucket A will be finished compost. Scoop it out from the top (the finished material naturally sinks), leaving the newer material above to keep processing.
Why this works for apartments: The two‑bucket system fits in the same footprint as a single bucket, costs almost nothing, and produces compost tea as a bonus. You never have to stop adding scraps — you simply rotate between two top buckets when one is full.
How to Build Your First Aerobic Bucket Composter (30 Minutes, $0)
If you don’t need meat/dairy handling and don’t want to buy worms or bran, the aerobic bucket method is your entry point. Here’s exactly how to build one:
Materials needed:
- One 5‑gallon bucket with a lid (food‑grade, clean)
- Drill with 1/4‑inch and 1/8‑inch bits
- Shredded newspaper or cardboard (browns)
- Kitchen scraps (greens)
- A handful of garden soil or finished compost (optional, but speeds things up)
Step 1 — Prepare the bucket.
Drill 10–15 small holes (1/8‑inch) in the lid for airflow. Drill 10–15 holes (1/4‑inch) in the bottom for drainage.
Step 2 — Add the base layer.
Fill the bottom 2–3 inches with shredded cardboard or newspaper. This absorbs excess liquid and provides carbon.
Step 3 — Add your first scraps.
Add 2 inches of kitchen scraps (vegetable peels, coffee grounds, eggshells). Chop scraps into small pieces — smaller = faster breakdown.
Step 4 — Cover with browns.
Add another 2 inches of shredded paper or cardboard. This prevents smells and flies. Bury any exposed food scraps under browns.
Step 5 — Moisten lightly.
Spray with water until contents feel like a wrung‑out sponge — moist but not dripping.
Step 6 — Repeat and wait.
Keep alternating greens and browns until the bucket is 3/4 full. Stir once per week. Finished compost is ready when it looks like dark, crumbly soil — typically 6‑8 weeks.
Using Your Finished Compost
Once your compost looks dark, crumbly, and earthy‑smelling, it’s ready to use. Here’s how to apply it to your windowsill and balcony plants:
| Plant Type | Application Method | Amount |
|---|---|---|
| Windowsill herbs | Mix into top 1‑2 inches of potting soil | 1‑2 tablespoons per 6‑inch pot |
| Balcony tomato plant that filled a 5‑gallon bucket | Top‑dress around the stem | 1/4‑1/2 cup per bucket, once per month |
| Houseplants | Sprinkle on soil surface, water in | 1 tablespoon per 6‑inch pot |
| Seed starting mix | Blend with potting soil (1:4 ratio) | 1 part compost : 4 parts soil |
Important: Never use unfinished compost directly on plant roots — it can burn them with excess nitrogen and introduce pathogens. If your compost still smells sour or has visible food pieces, let it sit for another 2‑4 weeks.
If you’re already harvesting and propagating seeds from grocery store vegetables, adding your own compost completes the full home‑grown food cycle: scraps feed plants, plants feed you, and nothing goes to waste.
Common Mistakes to Avoid
- Mistake 1: Adding meat, dairy, or oily foods to an aerobic or worm bucket. These cause rancid smells, attract pests, and can kill worms. Bokashi is the only apartment method that safely handles them.
- Mistake 2: Overwatering. A wet, soggy bucket goes anaerobic and smells like rotten eggs. If you can squeeze water out of a handful, add shredded paper immediately.
- Mistake 3: Forgetting browns. Too many greens (kitchen scraps) and not enough browns (paper, cardboard) causes ammonia smell. Aim for roughly 2 parts browns to 1 part greens by volume.
- Mistake 4: Sealing the lid completely in aerobic systems. Airflow is essential. If your lid is airtight, drill holes or leave it slightly cracked.
- Mistake 5: Giving up after a small failure. Every apartment composter has a smelly batch or a fruit fly invasion. Fix the problem, don’t quit. The right rescue steps (more browns, more air, less water) almost always work.
Myth vs Reality
| Myth | Reality |
|---|---|
| “Composting in an apartment always smells.” | A properly balanced bucket smells like damp earth or pickles. Bad smells mean something is off — and it’s fixable. |
| “You can’t compost meat or dairy at home.” | Bokashi composting handles meat, dairy, fish, and cooked food easily — it’s the only apartment method that does. |
| “You need expensive equipment.” | A free 5‑gallon bucket, a drill, and kitchen scraps are all you need. Worms and bokashi bran are optional upgrades. |
| “Composting takes a whole yard.” | The smallest successful compost system I’ve seen used a 2‑gallon bucket under a kitchen sink. Your space is enough. |
| “You have to turn compost every day.” | Once a week is fine. For bokashi, you never turn it at all — just drain liquid every few days. |
FAQ
Q1: Will my compost bucket attract bugs or rodents?
A: Not if you bury food scraps under a layer of browns (shredded paper, cardboard) and keep the lid sealed. Exposed fruit scraps attract fruit flies — always cover fresh additions. Meat/dairy in non‑bokashi systems attracts pests, so follow method guidelines.
Q2: How long until my first batch of compost is ready?
A: Aerobic bucket: 6‑8 weeks. Bokashi: 2‑4 weeks for fermentation, then 2 weeks in soil to neutralize — total 4‑6 weeks. Worm bin: 2‑4 months for first harvest. Bokashi is fastest; worms take longest but produce liquid fertilizer.
Q3: Can I compost in a bucket without drilling holes?
A: Yes — that’s bokashi. A sealed, hole‑free bucket creates an anaerobic (oxygen‑free) environment for fermentation. For aerobic composting, holes are essential for airflow and drainage.
Q4: What do I do with the liquid that collects at the bottom?
A: That’s compost tea — a free liquid fertilizer. Dilute it 1:10 with water and use it to water your plants. For bokashi, the liquid can also be poured down drains to clean them.
Q5: My bucket is full — now what?
A: For aerobic or worm systems, stop adding new scraps and let the batch finish for 2‑4 weeks. Start a second bucket while you wait. That’s why advanced composters keep two buckets rotating.
Reduce Even More Kitchen Waste
Composting is a huge step toward zero waste, but you can also use free AI prompts for fridge scraps and zero‑waste cooking to turn wilting vegetables and leftover odds and ends into meals before they even reach the compost bucket. Between AI‑powered meal planning and bucket composting, almost nothing from your kitchen needs to end up in a landfill.
Written by Sharjeel — Founder, informix.today
Last Updated: May 2026
Disclaimer: This article is for informational purposes only and does not constitute professional financial or legal advice. Always test DIY methods safely. Individual results vary based on local climate, scrap composition, and maintenance consistency.