Why Grocery Store Potatoes Are Cheap Seed Potatoes (And How to Grow Them in a Bag)
Turn sprouting grocery potatoes into 5–10 lbs of homegrown food. Learn the sprout inhibitor trap, cut-and-cure method, and hilling hack for bag growing.
You know that moment. You reach into the cupboard for potatoes, and instead of a firm, ready‑to‑cook tuber, you find a wrinkly, sprouted thing that looks like it’s trying to escape. Most people throw it away. But here’s what the grocery store doesn’t want you to realize: that “wasted” potato is actually a free seed potato worth $5–10 of homegrown food.
Yes, you can grow potatoes from grocery store potatoes. In fact, sprouted grocery potatoes are chemically identical to “seed potatoes” — they’re just smaller and often carrying a bit more risk. This guide covers the real truth: which grocery potatoes to use, how to avoid the sprout inhibitor trap, and exactly how to grow them in a simple grow bag on a balcony, patio, or even a sunny corner.
❓ The problem: Your grocery potatoes are sprouting in the cupboard. You could throw them away — or turn each sprouted potato into 5–10 pounds of fresh, homegrown potatoes.
👪 Who this helps: Apartment dwellers, bucket gardeners, and anyone who wants free food from scraps instead of buying $5–10 seed potatoes.
✅ What you’ll learn: Which grocery potatoes actually sprout (organic vs. treated), the “cut and cure” method to turn one potato into 5 seed pieces, how to grow them in a 10–15 gallon bag, and the hilling trick that doubles your harvest.
💰 What you’ll save: $20–50 per growing season by using sprouted grocery potatoes instead of buying certified seed — plus free potatoes from something you’d otherwise compost.
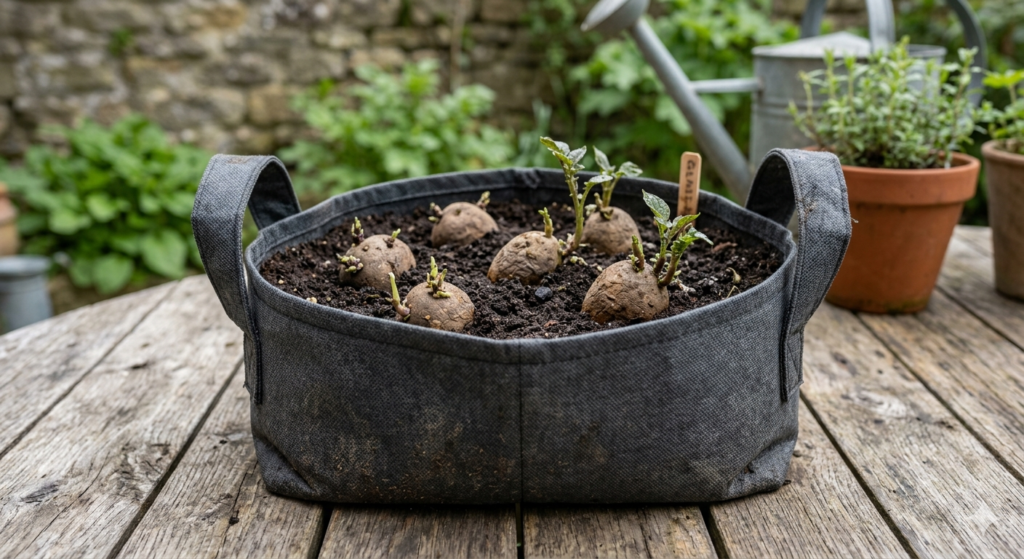
🛠️ Your next step: Set your sprouting potatoes in an egg carton on a bright windowsill (not direct sun) and start them chitting this week.
📅 Do this now: Each dollar of sprouted grocery potato can turn into $5–10 worth of homegrown food. Don’t throw away free plants.
The “Safe Sprouting” Rule: When to Eat vs. Plant Your Grocery Potatoes
Here’s something no other guide clearly explains: a potato with short, firm sprouts is both safe to eat AND ideal for planting. But there’s a point where it’s safe for neither.
The entire potato plant contains a natural toxin called solanine, with the highest amounts in the green parts, sprouts, and skin. Cooking does not destroy solanine — it only dilutes it in water.
| Potato Condition | Safe to Eat? | Good for Planting? | What to Do |
|---|---|---|---|
| Firm, no sprouts | Yes | Not yet — needs chitting | Store properly or cook |
| Short sprouts (under ½ inch), still firm | Yes (peel and remove sprouts generously) | Yes — perfect stage | Eat some, plant the rest |
| Long sprouts (over 1 inch), slightly soft | No — toxic risk increases | Weak — likely to rot | Compost or toss |
| Shriveled, soft, very wrinkled | No | No — no energy left | Compost |
| Green skin (any amount) | Remove green parts, can still eat non‑green parts | Yes — perfectly plantable | Cut away green for eating; plant the rest |
The rule of thumb from the Missouri Poison Center: For a child, wipe out the mouth and give water if green parts are eaten. For most people, small amounts cause only minor upset. But for planting purposes, green potatoes work just fine — the green is chlorophyll and solanine, not a sign of dead tissue.
Why Your Grocery Potato Might Never Sprout (The Sprout Inhibitor Problem)
You’ve had potatoes sit in your cupboard for weeks without a single sprout. Meanwhile, your friend’s potatoes are growing eyes in five days. What’s going on?
The answer is a chemical called chlorpropham (CIPC) — a sprout inhibitor sprayed on most non‑organic grocery store potatoes to keep them shelf‑stable for months.
Where it’s used:
How to get around it:
| Potato Type | Sprout Inhibitor? | Best for Planting |
|---|---|---|
| Conventional grocery potatoes | Yes (often) | ❌ May never sprout |
| Certified organic grocery potatoes | No | ✅ Best option |
| Farmer’s market potatoes | Usually no | ✅ Good option |
| Potatoes already sprouting in your cupboard | Minimal (inhibitor faded) | ✅ Ready to go |
Practical advice: If you want to grow from grocery potatoes, buy organic. They’re not treated with chlorpropham and will reliably sprout within 1–2 weeks in a warm, dark cupboard. If you already have conventional potatoes that won’t sprout, you can try washing them thoroughly and leaving them in a warm, humid spot for 2–3 weeks — sometimes the inhibitor degrades.
What Is Chitting and Why Does It Matter for Grocery Potatoes?
Chitting is the practice of encouraging seed potatoes to sprout indoors before planting. It gives your plants a head start and can lead to earlier harvests. For grocery store potatoes, chitting is even more important — it confirms the potato is actually viable and hasn’t been over‑treated.
How to chit your grocery potatoes (4 weeks before planting):
- Place potatoes in an egg carton with the “rose” end (where most eyes are) pointing up. The egg carton holds them upright and prevents sprouts from breaking.
- Put them in a bright spot — but not direct sun. A bright windowsill is perfect. Avoid dark cupboards, which produce weak, pale sprouts.
- Wait 2–4 weeks. Ideal sprout length is about 1 inch — sturdy, dark green or purple sprouts.
- Rub off all but 2–4 sprouts per potato just before planting. Too many sprouts create competition, resulting in many tiny potatoes instead of a few big ones.
Pro tip from UCANR: Do not use grocery store potatoes for planting because they may introduce diseases into your garden. Buy certified seed potatoes from a reputable local nursery. That said, many home gardeners successfully grow from organic grocery potatoes with no issues — it’s a calculated risk.
The “Cut and Cure” Method (Advanced: Turn One Potato into 5 Seed Pieces)
Here’s the advanced technique that turns a single grocery potato into multiple plants — but only if you do it right.
Most people’s mistake: Cut a potato into pieces with eyes and immediately plant them. Result: 50–90% rot in wet soil. The open flesh is a magnet for fungi and bacteria.
The correct method — cut and cure:
| Step | What to Do | Why It Works |
|---|---|---|
| 1 | Cut potato into pieces, each with 1–2 eyes | Each piece needs at least one sprouting point |
| 2 | Ensure each piece is roughly lime‑sized (1.5–2 ounces) | Too small → weak plant; too large → wasteful |
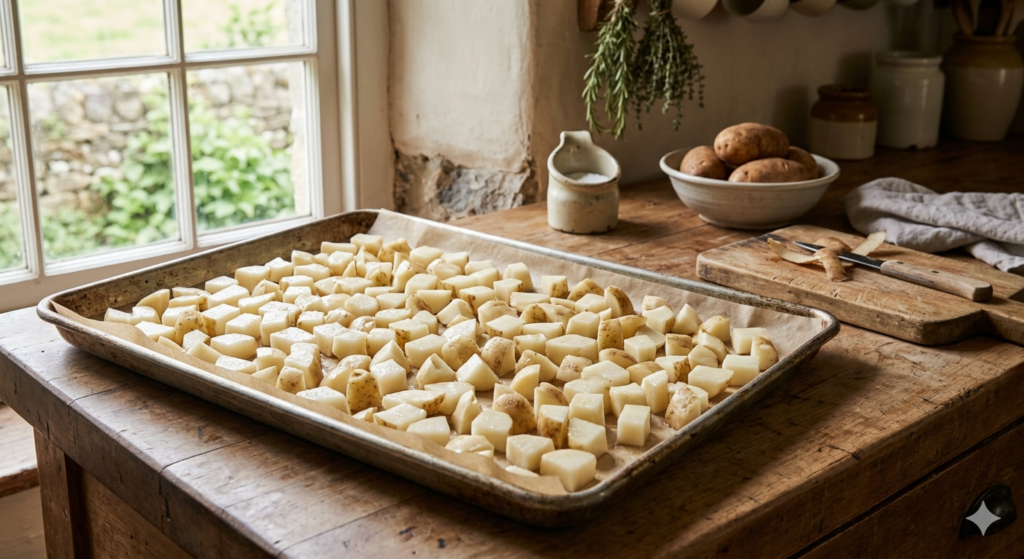
| 3 | Lay pieces on a tray in a warm, dry, shaded spot | Air circulation prevents mold |
| 4 | Wait 2–3 days for the cut surfaces to dry and form a callus | Callus seals the flesh, preventing rot in soil |
| 5 | Optional: dust cut sides with sulfur or wood ash | Extra fungal protection |
| 6 | Plant only after callus has formed | Safe to go into damp soil |
Do not skip the curing step. A 2–3 day cure can be the difference between 5 thriving plants and 5 mushy, rotting failures in your grow bag.
One Container, Three Yields: The “Hilling” Hack That Doubles Your Harvest
Here’s the secret that makes container potatoes produce three times more than leaving them alone: hilling.
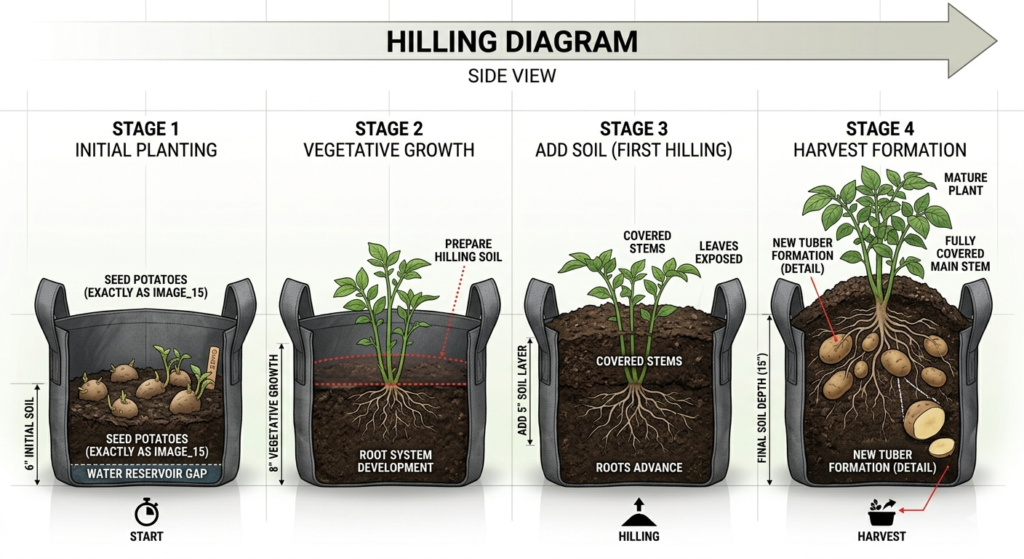
Tubers don’t grow directly from the seed potato’s roots. They grow on stolons — horizontal underground stems that emerge from the seed potato and then swell into potatoes. The more stem length you bury, the more opportunities for tubers to form.
The hilling schedule for a grow bag:
| Week | Plant Height | Action |
|---|---|---|
| Planting | — | Fill bag with 4–6 inches of soil, place seed potatoes on top, cover with 3–4 inches of soil |
| Week 2–3 | 6–8 inches | Add 3–4 inches of soil, burying lower leaves (leave top leaves exposed) |
| Week 4–5 | 10–12 inches | Add another 3–4 inches of soil |
| Week 6–7 | 14–16 inches | Final hilling — soil reaches near top of bag |
| Week 8+ | — | Stop hilling; let plants flower and die back naturally |
For fabric grow bags specifically: Fold down the top edge of the bag to form a 4–6 inch cuff at planting. As you hill, unroll the cuff gradually. This supports the stems and keeps soil contained.
What NOT to do: Hill too late. If stems have already grown tall and thin before you add soil, buried portions may rot. Hill when stems are still stocky and 6–8 inches tall.
The Hidden Yield Gap: What 1 Pound of Grocery Potato Actually Produces vs. Certified Seed
Let’s do the math that no one else shows you.
Certified seed potatoes:
- Typical yield ratio: 7–10x planted weight
- Example: 1 lb seed potatoes → 7–10 lbs harvest
- Cost: ~$5–8 per pound
- Cost per harvested pound: $0.50–1.14/lb (first year; free thereafter if you save your own)
Organic grocery potatoes (planted):
- Typical yield ratio: 3–5x (due to unknown disease load, variety, and growing conditions)
- Example: 1 lb grocery potatoes → 3–5 lbs harvest
- Cost: ~$2–4 per pound (or free if using sprouted potatoes you’d otherwise compost)
- Cost per harvested pound: 0.40–1.33/lb∗∗(ifpurchased);∗∗0.40–1.33/lb∗∗(ifpurchased);∗∗0 if using sprouted waste
The frugal verdict:
- If you’re buying potatoes specifically to plant, certified seed is only marginally more expensive and much more reliable.
- If you already have sprouted grocery potatoes that you’d otherwise throw away, planting them is free food — and that beats any seed potato price.
The one exception: Never plant grocery potatoes that have been treated with sprout inhibitors (conventional non‑organic). They may never sprout at all, wasting your time and soil.
How to Grow Potatoes in a Bag: Step‑by‑Step
What You’ll Need
| Item | Specification | Cost |
|---|---|---|
| Grow bag | 10–15 gallon, fabric (allows drainage and air pruning) | $8–15 |
| Potting mix | Loose, well‑draining (not garden soil — too heavy) | $10–20 |
| Seed potatoes | 1–2 pounds of sprouted organic grocery potatoes | $0–5 |
| Fertilizer | 5‑10‑5 or 10‑10‑5 (low nitrogen, higher phosphorus/potassium promotes tubers) | $5–10 |
Container size rule from UCANR: Use containers less than 18 inches high and at least 12 inches wide. Avoid containers that are too tall — they encourage endless stem growth without tuber formation.
Step 1: Prepare Your Seed Potatoes
If your organic grocery potatoes haven’t sprouted yet, chit them for 2–4 weeks as described above. If they’re large (bigger than a golf ball), cut them into 1.5–2 ounce pieces with 1–2 eyes each and cure for 2–3 days.
Step 2: Prepare the Grow Bag
UCANR method: Fold down the top edge of the bag to form a 4–6 inch cuff. Fill the bag with moistened potting mix until it’s about 4 inches deep. Lightly moisten the mix before planting — dry soil wicks moisture away from seed pieces.
Step 3: Plant
Place your seed potato pieces on the soil surface, spaced about 6 inches apart, with the eyes (sprouts) pointing up. For a 10–15 gallon bag, plant 3–5 seed pieces. Cover with another 3–4 inches of soil.
Step 4: Water and Wait
Water thoroughly after planting. Keep the soil consistently moist but not soggy. Grow bags dry out faster than plastic pots — check moisture daily, especially in hot weather. A dry spell followed by heavy watering causes cracked or misshapen tubers.
Step 5: Hill as They Grow
When stems reach 6–8 inches tall, add another 3–4 inches of soil, covering the lower leaves. Repeat every time stems grow another 6–8 inches until the soil reaches the top of the bag (usually 3–4 hillings total).
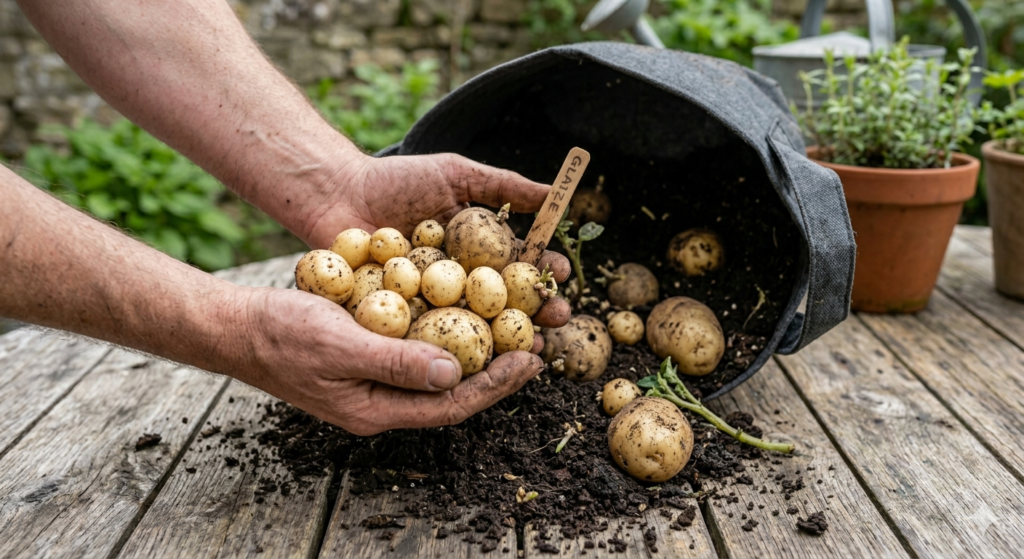
Step 6: Harvest
When the plants flower, tubers are forming. For new potatoes (small, thin‑skinned), harvest 2–3 weeks after flowering ends. For storage potatoes, wait until the foliage dies back completely (turns yellow and brown), then stop watering for 2 weeks. Dump the bag and collect your potatoes.
Cost‑Saving Reality
| Scenario | Cost to Start | Expected Yield | Cost per Pound |
|---|---|---|---|
| Buying certified seed potatoes | $8–10 | 8–10 lbs | $0.80–1.00/lb |
| Buying organic grocery potatoes to plant | $3–5 | 3–5 lbs | $0.60–1.67/lb |
| Using sprouted grocery potatoes you’d otherwise compost | $0 | 3–5 lbs | $0 |
| Saving your own seed potatoes from last year’s harvest | $0 (after first year) | 7–10 lbs | $0 |
The takeaway: Growing from grocery potatoes is most valuable when you’re already throwing sprouted potatoes away. Turning trash into 5 pounds of potatoes is the definition of frugal. If you’re buying potatoes specifically to plant, seed potatoes are the better investment for reliability and yield.
Common Mistakes to Avoid
- Mistake 1: Planting treated conventional potatoes. They may never sprout. Buy organic or use potatoes that are already sprouting.
- Mistake 2: Skipping the curing step after cutting. Wet cut surfaces rot in soil. Callus them for 2–3 days first.
- Mistake 3: Planting in garden soil. Garden soil is too dense and may contain diseases. Use loose potting mix with compost.
- Mistake 4: Overwatering. Soggy soil rots seed pieces. Grow bags need consistent moisture but not standing water.
- Mistake 5: Hilling too late. If stems are already long and thin, burying them invites rot. Hill when stems are still stocky.
- Mistake 6: Harvesting too early. If you want storage potatoes, wait until foliage has completely died back. Early harvesting gives thin‑skinned potatoes that don’t store well.
Myth vs Reality
| Myth | Reality |
|---|---|
| “Any grocery potato will grow.” | Conventional non‑organic potatoes are often treated with sprout inhibitors and may never sprout. Organic potatoes work best. |
| “You can’t grow potatoes in a small apartment.” | A 10–15 gallon grow bag on a sunny balcony or patio can yield 3–10 pounds of potatoes. |
| “Seed potatoes are a scam — grocery potatoes work the same.” | Certified seed potatoes are disease‑free and yield 2–3x more. Grocery potatoes are cheaper but riskier. |
| “You need full sun all day.” | Potatoes need 6–8 hours of sun minimum. Morning sun with afternoon shade works fine. |
| “Green potatoes are toxic and should be thrown away.” | Green potatoes are safe to plant — the solanine is in the skin and sprouts, not in the plant’s ability to grow. |
FAQ
Q1: Can I plant a potato that has long, pale sprouts?
A: Yes, but it’s not ideal. Long sprouts mean the potato has used up energy to grow in darkness. Plant it deeper than usual (6–7 inches) and handle the sprouts carefully — they break easily. You may get lower yield than from a properly chitted potato.
Q2: How many seed pieces can I put in one grow bag?
A: For a 10–15 gallon bag, plant 3–5 seed pieces spaced 6 inches apart. Any more and they compete, producing smaller potatoes.
Q3: Can I reuse my grow bag soil for another crop?
A: No — never reuse soil that grew potatoes. Potato diseases can persist in soil for years and will infect the next crop. Dump the soil into a flower bed or compost it separately.
Q4: Why didn’t my grocery potatoes sprout at all?
A: They were likely treated with chlorpropham (CIPC), a sprout inhibitor. Next time, buy certified organic potatoes or source from a farmer’s market.
Q5: How do I store my homegrown potatoes?
A: Cure them first: leave in a dark, well‑ventilated spot at 60–65°F for 10–14 days. Then store in a cool, dark, humid place (45–50°F). Do not refrigerate — cold converts starch to sugar, affecting taste. Do not store with onions — onions release gases that cause sprouting.
Bringing It Full Circle
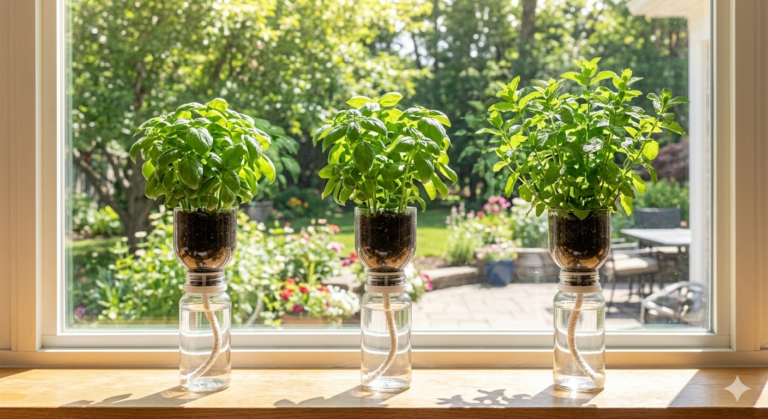
If you’re already growing windowsill herbs and vegetables, adding potatoes in a grow bag is a natural next step for more calories and storage crops. The same principles apply: don’t buy what you can grow, and turn waste into food.
Once you’ve mastered potatoes, you can also harvest and propagate seeds from other grocery store vegetables — from tomatoes to peppers to beans. And if you’re growing everything in containers, you might want to try a 5‑gallon bucket for balcony tomatoes as well. One bucket of potatoes, one bucket of tomatoes, one windowsill of herbs — that’s a surprising amount of free food.
Written by Sharjeel — Founder, informix.today
Last Updated: May 2026
Disclaimer: This article is for informational purposes only and does not constitute professional financial or legal advice. Always test DIY methods safely. Growing from grocery store potatoes carries a risk of introducing soil diseases; certified seed potatoes are recommended by agricultural extension services.