How to Make a $3 Drip Irrigation System for Balcony Containers Using Plastic Bottles
You step onto your balcony after a long weekend away. Your tomato plant — the one you carefully grew from a sprouted grocery potato — is wilted, brown, and gone. You promise yourself: next time, a drip system.
Here’s the truth: you don’t need a $50 irrigation kit. With a used plastic bottle, a needle, and 10 minutes, you can build a drip system that waters your balcony plants for you — for practically zero dollars.
This guide covers the real‑world details most articles skip: how to choose fast drip vs slow drip, why your bottle stopped working (and how to fix it), and a hidden “fertilizer bottle” trick that feeds your plants while you sleep.
❓ The problem: Balcony plants dry out fast in summer, and daily watering is a chore. Vacation? Forget about it — plants won’t survive three days alone.
👪 Who this helps: Balcony gardeners, container growers, and anyone tired of hand‑watering every single morning before work.
✅ What you’ll learn: How to build a $3 drip system from recycled bottles, choose between fast drip (thirsty plants) vs slow drip (vacations), fix clogs without starting over, and even turn your bottle into a slow‑release fertilizer feeder.
💰 What you’ll save: $20–50 on a store‑bought drip system — plus healthier plants (no more daily forget‑to‑water guilt).
🛠️ Your next step: Grab a used 1.5L bottle and a needle. You’re 10 minutes away from a system that waters for you.
📅 Do this now: Test your drip bottle this weekend before your next vacation. A practice run is worth a saved plant.
Method 1: The Classic Upside‑Down Bottle Dripper (Works on Everything)
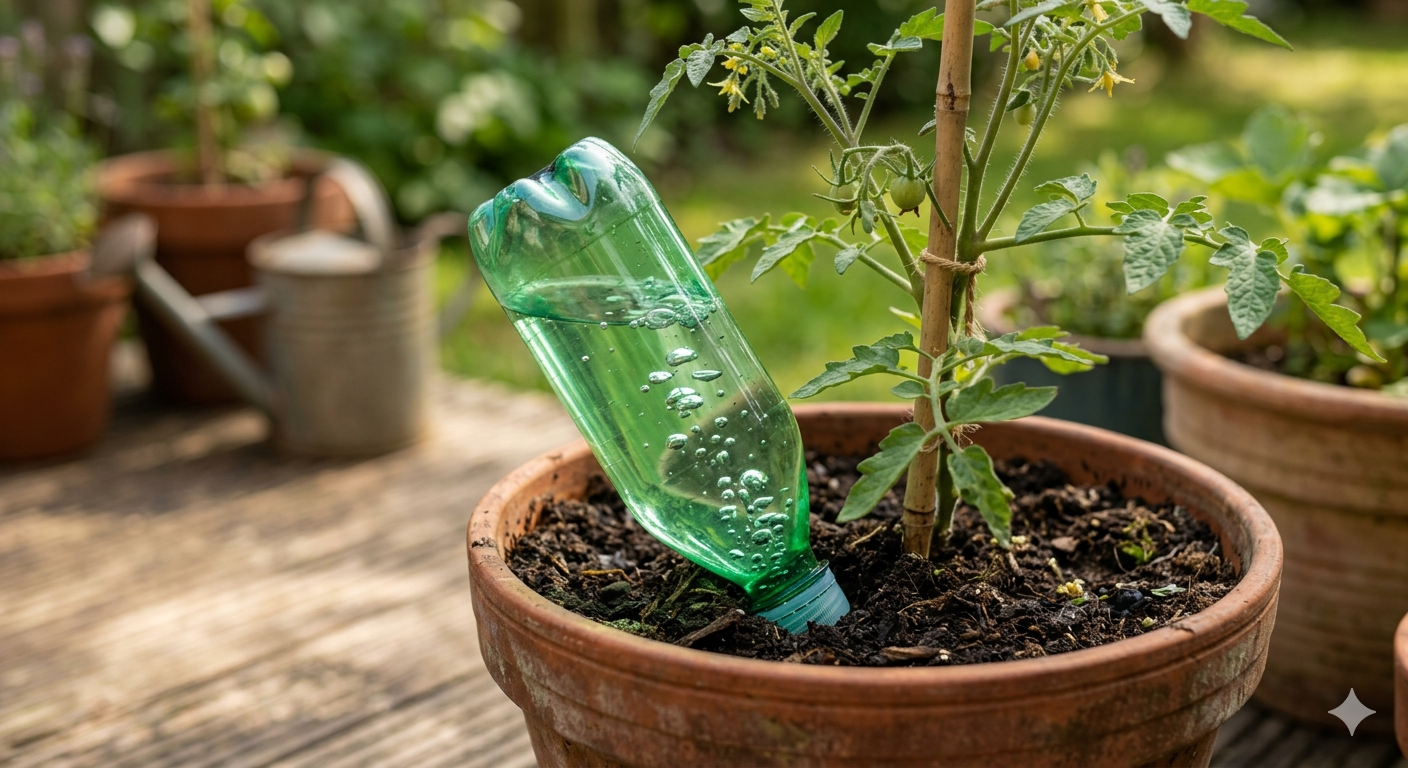
This is the fastest, most reliable method — and the one used by gardeners around the world. It works for any pot bigger than a coffee mug.
Step 1: Gather Your Materials
| Item | Where to Get It | Cost |
|---|---|---|
| 1–2 liter plastic bottle (water or soda bottle) | Your recycling bin | $0 |
| Small nail, needle, or push pin | Any desk drawer | $0 |
| Lighter or candle (optional) | Kitchen drawer | $0 |
| Scissors or knife | Kitchen drawer | $0 |
For edibles (tomatoes, herbs, peppers): Use BPA‑free bottles if available, though most modern water bottles are already BPA‑free.
Step 2: Prepare the Bottle
- Clean thoroughly — remove labels and any sugar residue from soda. Leftover sugar attracts ants and mold.
- Heat your pin/nail over a flame for 5 seconds (optional but recommended). Hot metal pierces plastic cleanly without cracking it.
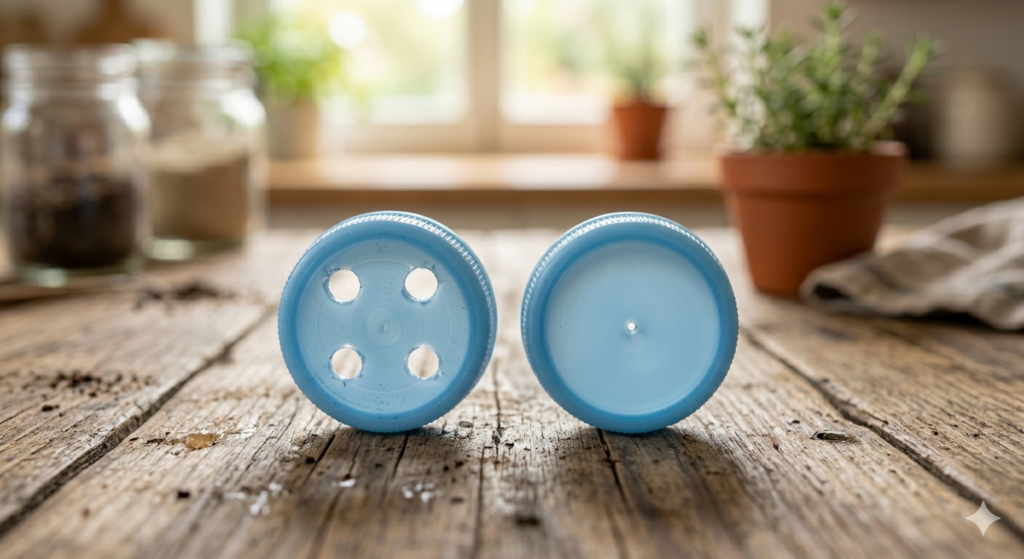
- Poke 2–4 tiny holes in the bottle cap only. Not on the bottle body. Start with two holes — you can always add more. Small holes = slow drip. Larger holes = fast drip.
Don’t rush this. Two perfectly sized needle holes are better than ten messy ones. You can always add more later. The tighter the cap is screwed on, the slower the water will seep out.
Step 3: Fill and Install
- Fill the bottle completely with water.
- Screw the cap on tightly.
- Flip the bottle upside down quickly (cover the cap with your finger at first).
- Dig a small hole in your pot near the plant’s stem — not too close to the roots (about 2–3 inches away).
- Push the bottle neck into the soil until the bottle is buried up to its “shoulder” (the point where the neck widens). The bottle should stand upright without wobbling.
- For very lightweight pots, push a chopstick or small stake through the bottom of the bottle into the soil for stability.
What should happen next: Within a minute or two, tiny air bubbles should appear inside the bottle. That means water is being displaced by air — a good sign that the system is working. One bubble every 10–30 seconds is ideal.
Step 4: Test Your Drip Rate
| Drip Rate | What It Means | Fix |
|---|---|---|
| One drip every 15–30 seconds | ✅ Perfect — bottle will last 2–4 days | Do nothing |
| Steady stream or fast drip | ❌ Holes too large or too many | Replace cap or seal some holes with tape |
| No drip at all after 5 minutes | ❌ Holes too small or soil too compact around cap | Unscrew cap slightly, or add one more tiny hole |
Watch for 5 minutes. If the bottle is dripping too fast, the holes are too large or too numerous. If it’s not dripping at all, you might need to make the holes slightly larger or add a couple more.
The “Fast Drip” vs “Slow Drip” Choice (Two Completely Different Designs)
Most guides act like one system fits all. It doesn’t. Your plant type and your schedule decide which design to use.
| Factor | Fast Drip | Slow Drip |
|---|---|---|
| Holes in cap | 4–6 holes, pin‑sized | 1–2 holes, needle‑pierced |
| Water duration | 4–12 hours | 2–5 days |
| Best for | Thirsty plants in full sun (tomatoes, peppers, large herbs) | Vacations, shade plants, succulents, or when you’re away for a weekend |
| Refill frequency | Every morning | Every few days |
| Cap tightness | Slightly loose | Fully tight |
How to choose: Observe your plant after a regular watering. Does the soil feel dry again in less than 24 hours? Use Fast Drip. Does it stay moist for 2 days? Use Slow Drip.
If your bottle is on a very sunny balcony, you’ll probably need the Fast Drip version for thirsty plants like tomatoes. For shade‑loving herbs like mint or parsley, the Slow Drip is plenty.
The Cotton Wick Hybrid (Double Your Water Without Making a Mess)
The upside‑down method has one flaw: dirt can get into the cap holes and clog them over time. Here’s a better design for long‑term use — especially for hanging baskets or pots with very fine soil.
This system is a game‑changer for hanging plants, which are hard to water with the upside‑down method because the bottle would need to hang above them.
How to Build the Wick Bottle
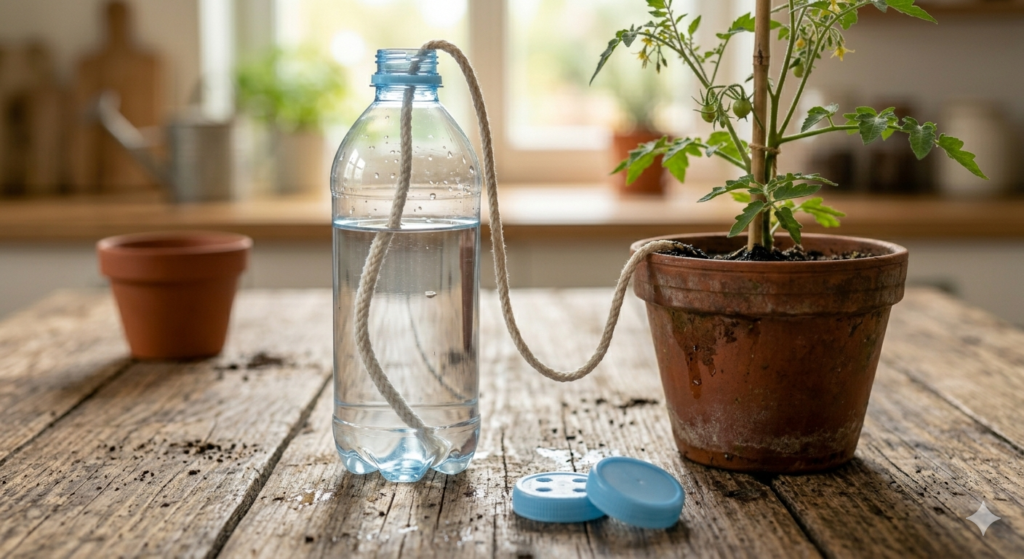
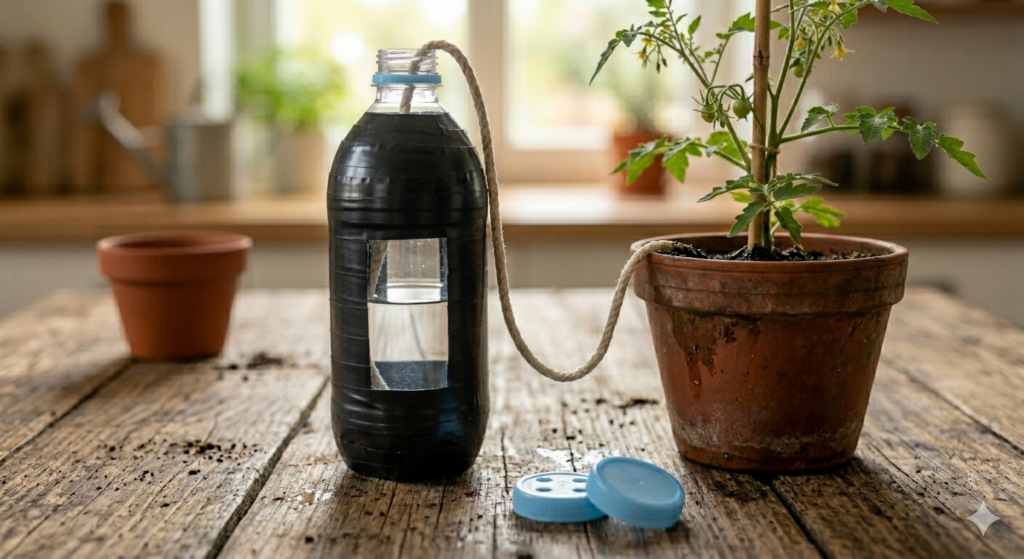
- Drill a single hole in the bottle cap (same size as a cotton string — about 1/8 inch).
- Cut a piece of thick cotton string (not synthetic — cotton wicks water, plastic does not). The string should be long enough to reach from inside the bottle to the bottom of the pot.
- Thread the string through the hole so half is inside the bottle, half outside.
- Fill the bottle with water and screw the cap on tightly.
- Place the bottle upright next to your plant, not upside down. Bury the loose string end in the soil.
- Water is pulled by capillary action from the bottle into the soil — slowly, steadily, and without dripping.
Why this works better: There’s no buried cap, so no dirt can clog the system. The bottle stays fully sealed except for the string hole, so no evaporation. And you can see the water level at all times.
Pro tip: Use old cotton shoelaces or cut strips from a cotton t‑shirt. Avoid nylon — it doesn’t absorb water.
Why Your Bottle Stopped Dripping (And How to Unclog It Without Redrilling)
You set up your bottle. It worked for a week. Then one morning, nothing. No drips. The bottle is still full. What happened?
The three most common clogs — and how to fix them:
One trick that prevents almost all clogs: Before burying your bottle, slide a thin nylon sock over the entire bottle. The sock acts as a filter — soil and roots can’t reach the holes, but water can still seep through. Remove the label first so you can still see the water level.
The Balcony Size Rule (What Bottle for What Pot)
Here’s the sizing guide nobody writes down.
| Pot Size | Recommended Bottle | Expected Duration (Slow Drip) |
|---|---|---|
| Small herb pot (1 gallon / 6‑inch) | 500ml bottle | 1–2 days |
| Medium flower pot (2–3 gallons / 8–10 inches) | 1 liter bottle | 2–3 days |
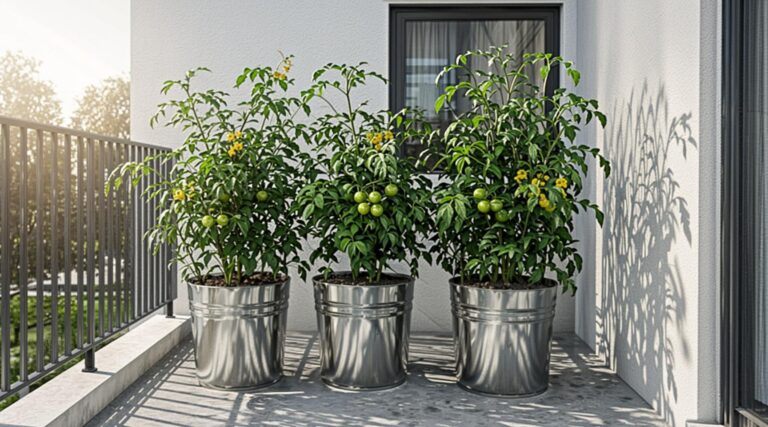
| Large vegetable pot — tomatoes, peppers, or 5‑gallon bucket (5 gallons) | 1.5–2 liter bottle | 3–4 days |
| Window box (multiple plants) | Two 1 liter bottles (one at each end) | 2 days each |
| Hanging planter | 500ml bottle + wick method | 3–5 days |
The general formula: 1 liter of water per 2 gallons of soil, plus 20% for hot/sunny balconies. If your pot is in direct afternoon sun, go up one bottle size.
If you’re leaving for a trip longer than 4 days, use the largest bottle you can fit (2 liters is usually the max that fits inside a standard 5‑gallon bucket).
One Advanced Habit: The “Continuous Feed” Fertilizer Bottle
Here’s the secret that turns your cheap bottle into a slow‑release fertilizer system — for free.
The basic idea: Instead of plain water, put dilute liquid fertilizer in the bottle. The slow drip feeds your plant every time it waters.
Important safety rules (read these first):
- Always test with plain water for 24 hours first. Make sure the drip rate is correct before adding fertilizer. You don’t want to dump a bottle of concentrated fertilizer all at once.
- Dilute to quarter‑strength (use one quarter of the amount listed on the bottle). Slow drip concentrates over time as water evaporates — too strong, and you’ll burn roots.
- Never use synthetic granular fertilizers. They don’t dissolve fully and will clog your cap holes instantly. Use liquid organic fertilizers or homemade brews.
Three free fertilizer recipes for your drip bottle:
| Recipe | Ingredients | Instructions | Best For |
|---|---|---|---|
| Banana peel potassium | 2 banana peels, 1 liter water | Chop peels, soak in bottle for 48 hours. Strain through cloth before using (or use the wick method). | Flowering plants (tomatoes, peppers) |
| Compost tea (fast) | 2 tablespoons finished compost, 1 liter water | Shake well, let settle for 30 minutes, pour top half into bottle (avoid sediment). | All leafy greens and herbs |
| Eggshell calcium | 5 crushed eggshells, 1 liter water | Crush shells fine, place in bottle neck with a cotton plug to filter. Fill with water. | Tomatoes (prevents blossom end rot) |
The “two‑bottle rotation” method for safety: Keep two bottles per plant. One with plain water, one with fertilizer. Alternate each refill. This prevents over‑fertilizing and gives roots a “water break” between feedings.
Watering While on Vacation
The upside‑down bottle system is a lifesaver for short trips. One 2‑liter bottle can water a 5‑gallon bucket tomato plant for 3–4 days.
For longer trips:
- Use two bottles per pot (insert one on each side of the plant).
- Use the largest possible bottles (up to 2 liters).
- Move all pots out of direct midday sun (rotate them into shade or group them together).
- Mulch the soil surface with shredded leaves, newspaper, or coco coir to reduce evaporation.
For a 5‑day trip, I’ve kept a balcony of 6 pots alive with nothing but 2‑liter bottle drippers on each plant. The key is testing the setup before you leave — fill the bottles, watch for 2 days, and adjust hole sizes until the timing matches your trip length.
Common Mistakes to Avoid
- Mistake 1: Poking holes in the bottle body instead of the cap. Water will drip sideways or upward (depending on orientation) and won’t reach roots. Cap holes point directly into soil when upside down.
- Mistake 2: Using too many holes from the start. Start with 1–2 holes in the cap. It’s much easier to add a third hole later than to seal a hole that’s too big. You can always enlarge existing holes slightly with a needle.
- Mistake 3: Burying the cap too deep. If the cap is more than 3–4 inches down, roots can grow into the holes and clog them. Bury only the neck of the bottle — the widest part of the bottle should be above soil level.
- Mistake 4: Using the same drip rate for all plants. A thirsty tomato in a 5‑gallon bucket needs a faster drip than a succulent in a 4‑inch pot. Adjust hole size based on each plant, not a one‑size‑fits‑all rule.
- Mistake 5: Forgetting to test before vacation. Set up your drip bottle for a full 48‑hour test run while you’re home. Check it morning and night. If it fails, you’re there to fix it. If it works, you can leave with confidence.
Myth vs Reality
| Myth | Reality |
|---|---|
| “You need a special store‑bought dripper.” | A needle and a plastic bottle work just as well for 1/50th the price. Store spikes just screw onto the same bottle. |
| “Plastic bottle irrigation is only for vacations.” | Many gardeners use these systems every single day to avoid morning watering chores. |
| “Clear bottles work best.” | Clear bottles grow algae in sunlight, which clogs holes. Wrap them in tape or use dark bottles for long‑term use. |
| “More holes = better watering.” | More holes usually means the bottle empties in an hour. Small holes with slow drip = deep watering. |
| “Any string works for wick irrigation.” | Only natural fibers like cotton wick water. Nylon and polyester are waterproof — they’ll sit in water all day and deliver nothing. |
FAQ
Q1: How long will a 2‑liter bottle water a 5‑gallon tomato plant?
A: With two small holes in the cap, approximately 3–4 days in warm weather. In very hot, sunny conditions, closer to 2 days. Always test your specific setup before relying on it.
Q2: Can I leave a drip bottle running indefinitely?
A: Yes — just refill when empty. For long periods, use the wick method instead. The buried cap method can eventually clog with mineral deposits after several months; soak the cap in vinegar overnight to restore it.
Q3: Will this work for indoor houseplants?
A: Yes, but be careful. Indoor soil dries slower, so use a smaller bottle (500ml) and start with ONE tiny hole. Place a tray underneath to catch any overflow. Test for 24 hours before leaving it unattended.
Q4: My soil is very heavy/clay‑like. What should I do?
A: Heavy soil doesn’t absorb water as quickly — water may pool around the cap. Use even smaller holes (slower drip) and bury the cap more shallowly. Better yet, switch to the wick method, which works in any soil type.
Q5: Can I use this system for seedlings?
A: Not directly — seedlings need very gentle watering. But you can adapt the wick method: place the bottle above the seedling tray and let the wick lay across the soil surface. Or wait until seedlings are 4–6 inches tall before using a drip bottle.
Bringing It Full Circle
If you’re already growing herbs on your windowsill grocery shelf, or training tomatoes in a 5‑gallon bucket, a drip system is the missing piece that turns a hobby into a low‑maintenance routine. It’s especially useful for plants in small containers, which dry out faster than ground soil.
And if you’re using your own compost in a bucket to feed your plants, pairing it with a slow‑release bottle full of compost tea gives you a closed‑loop system: scraps feed compost, compost feeds plants, and the bottle waters them automatically.
Written by Sharjeel — Founder, informix.today
Last Updated: May 2026
Disclaimer: This article is for informational purposes only and does not constitute professional financial or legal advice. Always test DIY systems thoroughly before leaving them unattended, especially with valuable plants.