Air-Dry Your Laundry Indoors Without Raising Humidity: The Placement Method
You’ve just finished a load of laundry and it’s raining, snowing, or too cold to hang anything outside. Running the tumble dryer feels wasteful, and you’ve heard it’s rough on your clothes anyway — so the rack goes up in the spare room, the door closes, and you hope for the best.
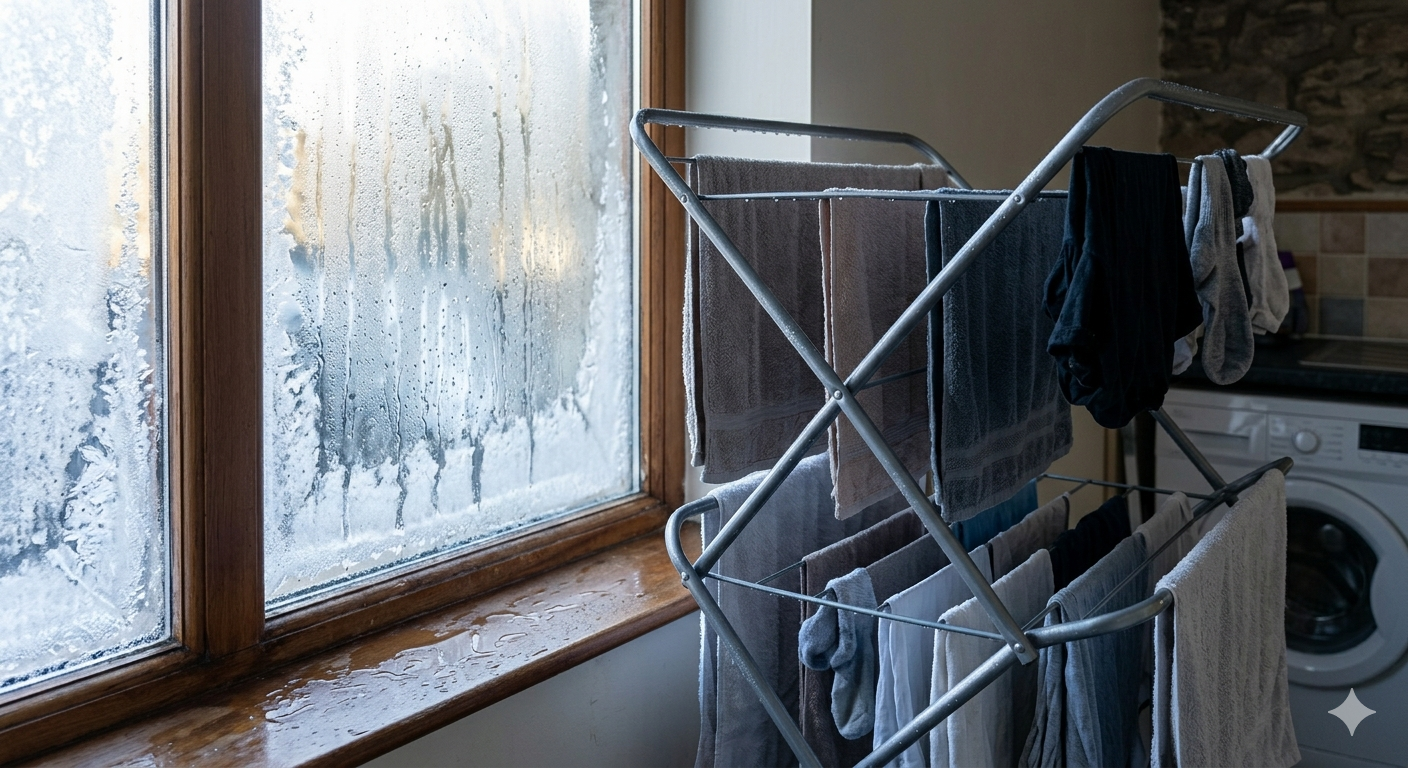
Two days later, the clothes are still damp, the room smells musty, and there’s a thin film of condensation creeping down the window.
Here’s what’s actually happening: a single load of wet laundry releases close to two litres of water into your indoor air. Without the right placement and airflow, that moisture has nowhere to go — humidity climbs past the point where mould starts to form, and in bad cases it can damage the room itself. The good news is that indoor drying doesn’t have to work out this way. Get the placement right and you can dry a full load without spiking humidity, growing mould, or turning the heating up. It comes down to where you put the rack and how you manage air movement. This guide walks through exactly that.
The 30-second version
The problem: A single load releases roughly 1–2 litres of moisture into the room — enough to push humidity past the ~60% threshold where mould becomes a real risk.
Who this is for: Anyone without access to outdoor drying — apartment renters, small households, or anyone trying to avoid tumble-dryer running costs.
What you’ll learn: Why airflow matters more than heat (a simple 3-inch gap can cut drying time roughly in half), which spots to avoid entirely (exterior walls top the list), and how to use a fan or dehumidifier without wasting electricity or freezing the room.
What it saves: Roughly £1.50–£1.70 per load versus a tumble dryer, on top of avoiding the much larger cost of mould-related repairs.
Try tonight: Pull your drying rack at least 8cm (about 3 inches) away from the nearest wall, and crack a window.
Why the urgency: On a cold wall, damp laundry left in place can create the conditions for mould growth within 24–48 hours.
The Exterior Wall Trap
It seems sensible — push the drying rack against an outside wall so it’s out of the way. But that instinct works against you. Exterior walls run noticeably colder than interior ones, particularly in winter, and when damp laundry sits close to a cold surface, the moisture condenses right there. That condensation seeps into the wall, and because the rack is standing in front of it, the resulting damp patch often goes unnoticed until it’s already a problem. Left unaddressed, black mould can take hold in as little as one to two days, and prolonged dampness can eventually mean peeling paint, crumbling plaster, or worse.
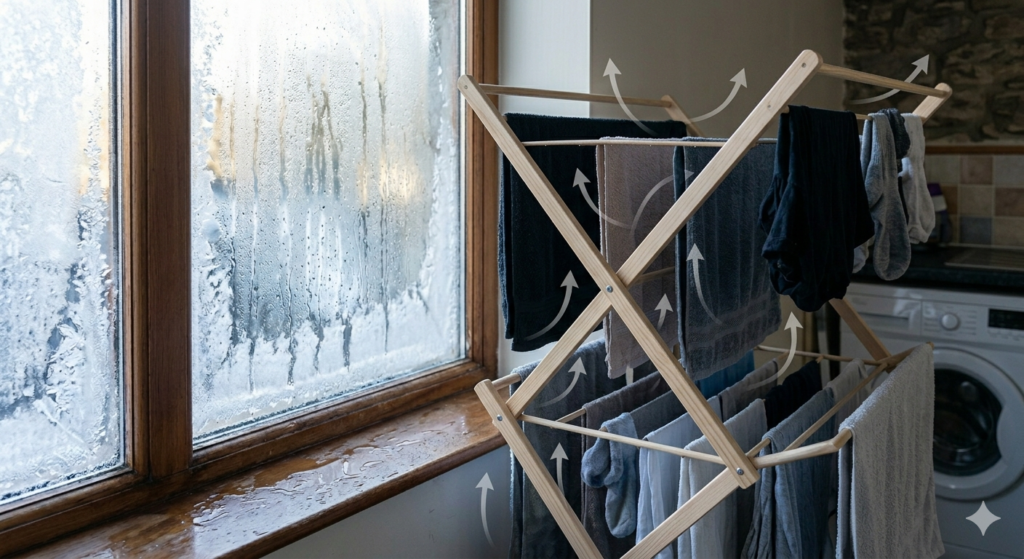
The rule: Keep the rack at least 30–50cm (roughly 12–20 inches) from any exterior wall, and favour interior walls or warmer, better-ventilated rooms instead.
Signs you already have a problem:
- Condensation forming on windows during or after drying
- A musty smell that lingers after laundry is put away
- Dark spots developing on walls, especially in corners
- Corners or wall sections that feel faintly damp to the touch
Airflow Beats Heat — The Gap That Cuts Drying Time in Half
The instinct that a warmer room dries clothes faster is only half right. What actually drives evaporation is air movement, not temperature — a fan running in a cold room will often out-dry a warm room with stagnant air.
Push a drying rack flush against a wall or radiator and you trap moisture between the wet fabric and that surface. The air right around the clothes quickly becomes saturated, evaporation grinds to a halt, and the load just sits there wet.
The airflow-gap rule: Keep the rack at least 8cm (about 3 inches) clear of any wall or radiator. That small gap is enough to let air circulate on all sides of each garment, and it can cut total drying time nearly in half.
Alternate heavy and light items. Don’t hang two towels side by side — alternate a towel with a t-shirt or similar light item so you don’t end up with dense, slow-drying clusters of fabric.
If you’re already working through home efficiency fixes, this pairs naturally with our loft hatch insulation guide and our DIY radiator heat reflector guide — different problem, same underlying logic of managing air and heat properly.
Using a Fan in Winter Without Freezing the Room
A fan speeds drying up considerably, but pointed straight at wet laundry in winter it can make a room feel 3–5°C colder, and blasting cold air directly onto delicate fabric like wool or cashmere can damage the fibres.
| Fan type | How to use it | What to avoid |
|---|---|---|
| Standing/pedestal fan | Position it 1–2 metres away, angled so air skims across the clothes toward a window rather than hitting them head-on | Aiming it directly at the laundry — creates windchill and can damage delicates |
| Ceiling fan | Set to winter mode (clockwise, low speed) so air is pulled up and redistributed gently | Running it at high speed, which just cools the room unnecessarily |
| Bathroom extractor fan | Dry laundry in the bathroom with the fan running, door closed, and a window cracked | Running the extractor with no fresh air source — it just recycles the same humid air |
The 20-minute rule: Run the fan in bursts, opening a window for about 5 minutes every 20–30 minutes to push moisture out, then closing it again to hold onto the heat.
Why Your Dehumidifier Might Not Be Working
Dehumidifiers are genuinely cheap to run for this — often just a few pence an hour, well under the cost of a tumble-dryer cycle. But placement mistakes quietly wreck their efficiency. Most units need roughly 30cm (about 12 inches) of clearance behind them to draw air in properly; push one against a wall and you can cut its moisture-extraction capacity by 40–60%.
Getting the setup right:
- Keep the drying rack clear of walls (the same 3-inch rule from earlier).
- Give the dehumidifier at least 30cm of open space behind its air intake.
- Keep it close enough to the laundry to be effective, but far enough to avoid drips landing on it.
- Angle the airflow output toward the clothes, not away from them.
- Run an extra spin cycle in the washing machine first — it strips out surplus water and can cut drying time (and electricity use) by 25–30%.
Rough cost comparison per load:
| Method | Estimated cost | Mould risk |
|---|---|---|
| Tumble dryer | £1.20–£1.70 | Low |
| Dehumidifier + rack | £0.30–£0.50 | None |
| Airflow-gap + open window | £0.00 | Low, if managed |
| Radiator drying | Variable (higher boiler load) | Very high |
Where to Actually Put the Rack
| Spot | Why it works | Watch for |
|---|---|---|
| Near a window with a cross-breeze | Moisture gets carried straight outside | Closing the window traps the humidity back in — keep it cracked while drying |
| Between a window and an open doorway | Creates a passive draft that pulls moisture out | Furniture blocking the path kills the airflow |
| Bathroom with extractor running | Fan actively removes humid air | Small bathrooms saturate fast — keep the door closed with the fan on |
| Under a ceiling fan (winter mode) | Moving air stops moisture pooling in one spot | Keep delicate fabrics out of direct airflow |
| Hallway with doors open at both ends | A natural “chimney” draft pulls air through | Can send cold drafts into adjoining rooms |
Skip bedrooms and living rooms. These are rooms you spend hours in, and drying laundry there raises the moisture you’re breathing, which matters more if anyone in the house has asthma or allergies.
What It Actually Costs
| Method | Annual cost (4 loads/week) | Hidden cost |
|---|---|---|
| Tumble dryer | £120–£200 | Wear and tear on clothing |
| Radiator drying | Variable | High mould risk, possible structural damage |
| Proper indoor air-drying | £0 | A few extra minutes of planning per load |
The real financial risk isn’t the tumble dryer bill — it’s mould remediation, which can run into the hundreds or thousands of pounds if damp is left unmanaged. Damp and mould affect a significant share of homes in England alone, with cases climbing in autumn and winter as ventilation naturally drops. If you already have a dehumidifier, running a 200W unit for 8 hours costs roughly 40p — less than half of one tumble-dryer load.
Mistakes That Undo All of This
- Closing the door. Sealing moisture into a small room is the single fastest route to mould. Leave the door open so moisture disperses into a larger volume of air.
- Overcrowding the rack. Garments touching each other stay damp at the contact point. Spread items out, even if it means using every other bar.
- Mixing heavy and light items on the same rack without spacing them out. Towels hold far more water than a t-shirt, and that extra moisture keeps everything nearby damp longer. Alternate heavy and light items instead.
- Drying on radiators. Beyond being a fire risk, this traps condensation right against the wall and wastes heating energy that’s now evaporating water instead of warming the room.
- Ignoring early warning signs. Condensation on the glass, a musty smell, or laundry that’s still damp after 24 hours means the current setup isn’t working — fix the placement before mould actually appears.
Myth vs. reality
Myth: Warm rooms dry laundry fastest. Airflow does more work than temperature. A cold room with a fan running can out-dry a warm, still room.
Myth: Any out-of-the-way corner will do. Corners against exterior walls are actually the worst spots — coldest surface, least air movement.
Myth: Dehumidifiers are expensive to run. A typical 200W unit costs roughly 5–7p per hour — a fraction of tumble-dryer running costs.
Myth: Keep windows open the whole time you’re drying. Short 5–10 minute bursts work better. Leaving a window open for hours cools the walls and can actually make condensation worse once you close it again.
Myth: Indoor drying is inherently bad for air quality. The real driver of health risk is unmanaged moisture, not indoor drying itself. Good placement and airflow make it manageable even for households with asthma.
Drying Multiple Loads in One Day
Running several loads back-to-back without a plan can push indoor humidity past 70% — a level where mould can establish itself in as little as ten days. Here’s how to stagger it properly.
Tiered rack arrangement (“drying chimney”):
- Lightest items (socks, underwear) on the bottom tier
- Medium items (t-shirts, blouses) in the middle
- Heaviest, tallest items (sheets, towels) on top
Warm, moist air naturally rises, so this arrangement lets moisture escape upward instead of getting trapped between layers.
The 2-hour stagger rule: Don’t hang a second load right after the first — give the room’s humidity roughly two hours to drop below about 55% before adding more wet laundry. A basic hygrometer (£5–£10 online) makes this easy to check rather than guess.
Small flats — the open-corridor trick: Position the rack in an open doorway itself. The temperature gap between the room and the hallway sets up a natural air exchange that helps pull moisture out.
A sample 3-load day:
| Time | Action | Approx. humidity |
|---|---|---|
| 8:00 AM | Hang Load 1 (towels, heaviest) | Rises to ~65–70% |
| 10:00 AM | Check humidity — hang Load 2 if under 55%, otherwise wait | ~50–55% |
| 1:00 PM | Rotate Load 1, move Load 2 to the best airflow spot | ~55–60% |
| 3:00 PM | Hang Load 3 (lightest items) | ~60–65% |
| 6:00 PM | Remove Load 1; run dehumidifier overnight for Loads 2–3 | ~50–55% |
FAQ
How do I know if my indoor humidity is too high while drying? A cheap hygrometer (under £10) is the most reliable way — watch for readings consistently above roughly 60%. Without one, condensation on windows, a musty smell, or damp-feeling windowsills are reliable warning signs.
Is it safe to dry laundry indoors if someone in the house has asthma? Yes, as long as ventilation and humidity are managed. Drying in a closed room can meaningfully raise indoor damp and create good conditions for mould spores, which can aggravate asthma. Use a dehumidifier, keep air moving, and avoid drying in bedrooms or living rooms.
How much water does one load of laundry actually add to the air? Roughly 1–2 litres of water vapour per load — enough to raise humidity by 15–25% within an hour in a poorly ventilated room. That’s comparable to boiling a full kettle continuously for two to three hours.
Should the bathroom door stay closed if I’m using the extractor fan? Yes — keeping it closed lets the fan create negative pressure that pulls moisture out through the vent. With the door open, the fan mostly just draws in dry air from elsewhere in the house instead of clearing the room’s humidity.
Can I dry laundry indoors with no fan or dehumidifier at all? Yes, but placement becomes much more important. Keep the airflow gap, crack a window, and spread items out as much as possible. In mild weather this works fine; in cold, damp conditions it can take two to three days and raises mould risk. An extra spin cycle before hanging clothes removes a meaningful chunk of water and is the cheapest first step regardless of your setup.
Bringing it together
Cutting home energy waste is usually a series of small habit changes rather than one big fix. You might already be lowering your fridge’s power draw or using bubble wrap for window insulation. Indoor laundry drying works the same way — a small change in where the rack sits and how air moves through the room protects your home and your budget without ever needing the tumble dryer.
If you’ve already worked through our washing machine energy guide, this is the natural next step: you’ve already cut energy during the wash — now you’re not losing it again during the dry.
Written by Sharjeel — Founder, informix.today Last updated: July 2026
Disclaimer: This article is for general informational purposes only and isn’t professional medical, structural, or engineering advice. If you suspect existing mould or damp damage in your home, consult a qualified professional.